Printables
The mission for 2020! Make what you love January 3, 2020 18:15 19 Comments
I have no resolutions, they always feel like I'm setting myself up to fail because there's so little flexibility and life changes so much. But I do have a new mission for the decade and it's to live by the mantra "Make what you love"
(This is me on the LCC stand, at the Handmade Fair in 2014.)
London Craft Club was started on exactly that idea back in 2014. The plan was to make a business I love, providing a service I love, helping people make things they love, and giving me the opportunity to actually make things that I love on a daily basis. It's been six years and despite the occasional veer off-course that is pretty much still how it is here.
This year, I want the workshops I create to really reflect and share the proper joy I get from the making process, and the pleasure of being surrounded by things I've made. I want other people to feel that brilliant buzz of being a maker! Just two days ago I was holding the glasses I'd etched some ferns leaves onto and feeling like I was standing a foot taller than I was that morning. Everyone should get that feeling.
So this is our theme for the year at London Craft Club - Make What You Love. Are you in? I hope so because I am popping with excitment to share it all with you!
Check out what's coming up in 2020 and make what you love too.
All my love
Sonia x
Free 2020 printable calendar for you January 3, 2020 03:35 20 Comments
Happy New Year to you! If you are still in need of a nice calendar to put all your new year plans into, we have one for you here! It's not too heavy on the ink if you're printing it at home. There's none of those strange download apps either - just click the link and the .pdf opens up there and then for you to save on to your computer.
I'm not doing resolutions this year, they're so guild-laden to start the decade! But I do love a goal, and I have some personal ones to put in here. I have so many apps but an actual real life calendar on the wall makes a totally different impact, it's just so unavoidable. I'm going to put a few workshops in my diary - have a look at some of ours ;-)
I feel bad about the paper - so I've started shredding all the crappy bits of correspondence I get so I can make it into new paper. I totally love this new craft so you may well see it pop up as a workshops soon!
How to use fabric to decorate your Christmas cards November 17, 2019 10:11 207 Comments
We love Cath Kidston fabrics for interiors, but we wanted to make some Christmas cards with it too. You can join our workshop at the Cath Kidston London Picadilly store, or if you can’t make that here’s our handy How-To.
You will need:
- Cath Kidston fabric
- Fusible facing
- Sharp scissors
- Double sided tape
- Blank cards (white and Kraft
- Fine black ink pen
- Extra card embellishments
Step One
Iron the fusible facing onto the back of the fabric. Make sure you put the shinier side on the fabric and protect your iron and ironing board with baking paper. This is to to stop you fusing the facing to your ironing board or melting the facing on to your iron! When you're done, let the fabric cool
Step Two
Draw your design on the back of the fabric, and cut it out with your sharp scissors
Step Three
Use the double-sided tape to stick your fabric elements down. Add details with your pen and embellishments
Step Four
Pop it in an envelope and post!
How to create a cute Christmas wreath November 16, 2019 13:23 193 Comments
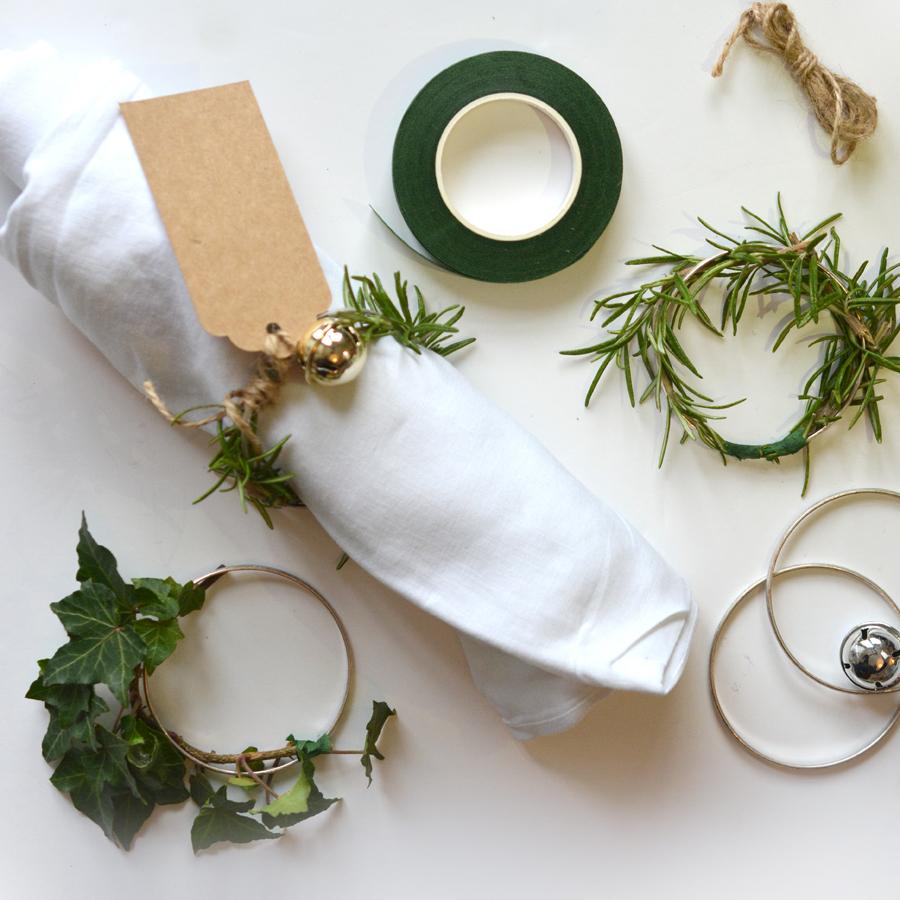
A wreath adds a lovely festive dash to any door! We’re making a wreath using artificial foliage and Cath Kidston fabric, because if you use it for many years to come it’s good way to avoid waste at Christmas. Join us for a workshop in Cath Kidston's Manchester store or follow this DIY!
You will need
- A plain wreath base. We’re using a twig base, but willow or metal frames are just as good
- Thin florist wire
- Pliers
- 3 artificial eucalyptus stems
- Some artificial yew or other foliage
- A glue gun and glue sticks
- Pine cones
- Bark stars or other wooden embellishments
- Cath Kidston fabric
Step One
Use the pliers to trim the eucalyptus stems down to about 20cm, and to cut some lengths of florist wire about 10cm long
Step Two
Choose a point to be your focal point on the wreath. Arrange the stems on the wreath pointing out from the focal point. Push the wire through the wreath base and twist it round the bottoms of the stems to secure them. Don’t worry if the centre looks a bit of mess at this stage! Arrange the stems and use the glue gun to secure them in the position you like.
Step Three
Dress the focal point for the centre of your wreath using pom-poms, pine cones, berries and wooden embellishments. Use a combination of florist wire and the glue gun to secure them in place at lots of points.
Step Four
Add a few more smaller embellishments to the rest of the wreath - we love the tiny mushrooms and gingerbread men
Step Five
Take some of your Cath Kidston fabric and make a little snip in the edge. Use the snip to start a tear in the fabric, and rip until you have a 5cm wide strip. Pull all the excess threads away and you’ll be left with a pretty frayed edge. Tie the ribbon round the top of the wreath, then tie a big bow.
Step Six
You can put a little piece of string through the back of the ribbon to hang your wreath. Pop it on a door and feel the Christmas vibes!
Book your Cath Kidston Wreath workshop here
How to make a felted stocking November 15, 2019 21:57 149 Comments
This is the perfect Christmas craft for
beginners, especially if you want something that can use year and year again! We’ve teamed up with Cath Kidston for the second year to bring you a this as a workshop too. Book here and if you can’t make it, here’s a DIY for you.
You will need:
A plain burlap, linen or cotton stocking
A medium felting needle with handle
A felting sponge or brush
Some balls of yarn that are wool or a wool mix with a high proportion of wool (at least half)
A water soluble pen
Step One
Assemble the felting needle. Pull the wooden insert out of the handle and lay the needle in the groove. Make sure you push the thin end of the insert back in to the handle until the needle is snugly in place
Step Two
Draw your design on with the water soluble pen
Step Three
Put the sponge inside the stocking. Lay the wool down on the stocking and push the needle right through the wool, stocking and sponge. This will pill some of the wool through the stocking, lightly attaching it it. Rough out you design in this way.
Step Four
Once you’ve built up a bit of your design, repeatedly stab the wool into the stocking making sure the sponge is behind the are you are felting. This process will gradually felt the wool, making it mat up and attach to the stocking.
Step Five
Felt your whole design. When you’re done, gently pull the sponge away. To remove the water soluble pen marks, lightly spray tve stocking in water.
Step Six
To add a rustic bow, take a piece of fabric and make a little snip in one edge. Rip the fabric from the snip and pull off any excess thread, leaving a pretty frayed edge. Use it to make a bow to stick or sew on the back of your stocking. Lastly, gang your stocking somewhere Santa will see it!
Book your ticket to this Cath Kidston workshop here
Your craft hobby can make you more confident at work. October 20, 2019 13:26 301 Comments
I was delighted to see Stylist Loves, the regular email from Stylist Mag, highlighting how craft can build confidence at work. (Not least because they flagged London Craft Club as the place to go get a good hobby.)
It wouldn't be the first time that science has started to confirm what those of us who craft already know. The idea that a skill you develop as part of your leisure can actually increase your confidence, and that you can benefit from that increase in all areas of your life, is not a surprise to us.
We already know that simply being able to make stuff impresses other people, which leads to compliments which leads to increased confidence. That's not just anecdotal either, there's a study to support that. Even if it's obvious, it's good to remember. It also proves that your compliments to other crafters are worth their weight in gold. Keep on dishing them out!
Some years back, I worked on an amazing project that focused on improving teenagers confidence. It worked by getting them involved in sport through events that they organised themselves. They achieved things they wouldn't have expected of themselves, and they tangibly benefitted from the experience. I've often felt the similarities between sport and craft on that front are similar - that we take something on with quite low expectations, and surprise ourselves with what we can achieve. The right teachers and mentors can help speed that along and magnify the effect. It's a great feeling to achieve something you didn't think you could and it stays with you. Incidentally, it's a great feeling to facilitate that for someone else, so we're luck at LCC that this our work
We also know that leisure time can be spent doing a hobby in order to recharge and replenish our resources for our work. So the less craft-like your day job, the more you will benefit from craft in terms of work confidence. Again, this confirms what we hear all the time at craft club - achieving in an area unrelated to where you think your expertise lies is a great boost!
So there you have it - if you don't do anything makey for a living, you're most likely to benefit from taking it up as a hobby. Let's get you started! Click for workshops
Read Stylist here and the actual study here
The quiet part October 13, 2019 08:35 423 Comments
At a social event, it's not normally a sign that things are going well if everyone is sat in silence. But at London Craft Club events, it's pretty much always a mark of having done our job well.
The wonderful part, about an hour in, is when the conversation turns to concentration, and all you can hear are the little noises of making. Paper being cut, the hiss of burning wood, the click click of knitting needles, and not much else.
Getting in the flow of crafting is one of the great rewards of making things with your own hands. You stop thinking about the world, and focus entirely on what you are doing as time flies by.
It's great having a lovely thing that you've made, and there's definitely a buzz from learning a new skill. But most of all I love the sense of zooming in on one activity and immersing yourself in getting to know the material you are working with.
Silence over a shared activity feels like an extra luxury. Normally I find myself filling the time I spend with people by talking, whether I have something to say or not. A shared activity opens the door to sitting in comfortable, companionable silence where I'd normally be pulling out the stops to be interesting and entertaining. It makes for a good mix of sociable and relaxing.
I've lost track of the number of times I've noticed a tired shoulder or wrist, and looked up to realise hours have passed by and I haven't thought about anything except what I'm working on. This year one of my resolutions has been to do more making where the end result is in the distant future, so I can focus on mastering the skill and the material.
Have you got a craft you can totally lose yourself in? Or if you're looking to find one, check out our What's On page
Super quick flower clip May 23, 2019 13:53 2 Comments
Summer is here and the fun is starting! Here's a quick flower hair clip DIY that's great for festivals, parties and just generally hanging out in the sun.
You can get faux flowers in all sorts of places now - IKEA does a lovely selection, but you can get them in lots of random places too. If you get a spray, just twist all the flowers off and use them as individuals
You probably don't need instructions for this one! Grab your flowers and a glue gun (or super glue, or even florists wire if you don't have a glue gun) and attach three of the biggest brightest flowers you can.
Check out our very own Briony wearing a super colourful one we made up for her for a party. It looks amazing with her hair, doesn't it!
Check out our Hen Party Flower Crowns if you like these, we do have a really glorious selection of flowers. See more here
Mother's Day crown craft with Paperchase! March 22, 2019 12:07 2 Comments
Last week we had a fabulous time helping some kids make these cute crowns to wear for Mothers Day. It was part of a collaboration with Paperchase, so we used all their gorgeous stickers, cards and embellishments to make it glam as possible. Download the templates to cut out one yourself here - just tape on a length of ribbon the back to stabilise it and so you can tie it round your head. Choose from gems, hearts or flowers!
What it was really like to make those giant Peg Boards January 27, 2019 12:31 186 Comments
We love Pinterest of course, but it does tend to tout a project as "quick and easy" even if it's a week long marathon. So when we needed some brilliant display furniture for our studio, we thought we'd road test some peg board DIYs
Step one - find a timber yard
First I went to B&Q and Homebase but they didn't have nice pale plywood, only the very red stuff with the nasty splintery edges. So I went to BuildBase, a trade builders merchant. I know it's 2019 but still lots of people tell me they feel a bit out of their depth in these places. Don't, they want your money just like anyone elses.
I explained that I'm not an expert and need guidance and asked for a good quality plywood with an attractive pale colour, 12mm thick. I chose the specific piece I wanted with a nice grain and no dirty marks, and a man with a forklift helped me get a two and half metre board off the pile and over to the cutting area.
Step two - cutting
The boards are 122cm x 244cm. Plan your cuts in advance, and draw it out. I should have done a better drawing than this as the guy kept wanting to look at it.
Don't go at the weekend if you can avoid it, because they don't like doing projects at busy times. I got three 144 x 66cm boards and then from the off-cuts cut a 15cm strip and two 12cm strips to make shelves. Then I got them to cut the shelves into 56cm, 32cm and 18cm lengths. Expect to be charged for each cut, but only between 20p and 50p.
Buy one piece of dowel (wooden pole) for the pegs. I like 12mm because the shelves are also 12mm thick and it looks good together
Step three - more maths
Workout the holes spacing as you want. I used 8cm between hole. Top tip! remember your measurements are from the centre of the hole, not the edge of each hole. Here is my working out! Mark the dots on the board.
Step four - drilling
This is the hard bit. You need scrap wood to put under your plyboard so when you drill through the boards, you don't then drill the floor itself. There will be sawdust everywhere, be aware. In the air, in your hair, on the shelves, everywhere.
You need an 11mm drill bit which drills a snug hole. A 12mm hole is too big. It's a scary looking sod but really it's no different to a normal drill bit. It has a helpful spike in the middle to help you position the drill.
Ideally you'll have a pillar drill fitting like this - but beware that the one you buy fits your actual drill.
KNEEL ON THE WOOD YOU ARE DRILLING. Sometimes the wood catches on the drill and spins round, this is dangerous. Your body weight will prevent this.
Start drilling slowly, then speed up once it's gone into the wood. Go slowly again as you come out the back to avoid splintering the back of the wood as the drill punches through.
Step five - cut the dowel
Use a hand saw. Put the dowel on a chair and put your foot on the dowel to hold it steady. Saw close to the edge of the chair and don't saw hard, just gently back and forth until the cut is done. If there are splinters sticking off the end, cut them off with scissors.
Step six - sanding
Use sandpaper to finish off the shelves and dowels to a nice smooth finish.
Phew.
That was not at all quick and easy, it was a lot of heavy, messy hard work that will leave you with aching arms, sawdust everywhere and three of the most amazing fabulous wonderful huge peg boards for about £50. (£70 if you buy a pillar drill fitting. So a saving of about £530.
Would you like to make a smaller version of these in our workshops? Let us know, we do respond to your suggestions!
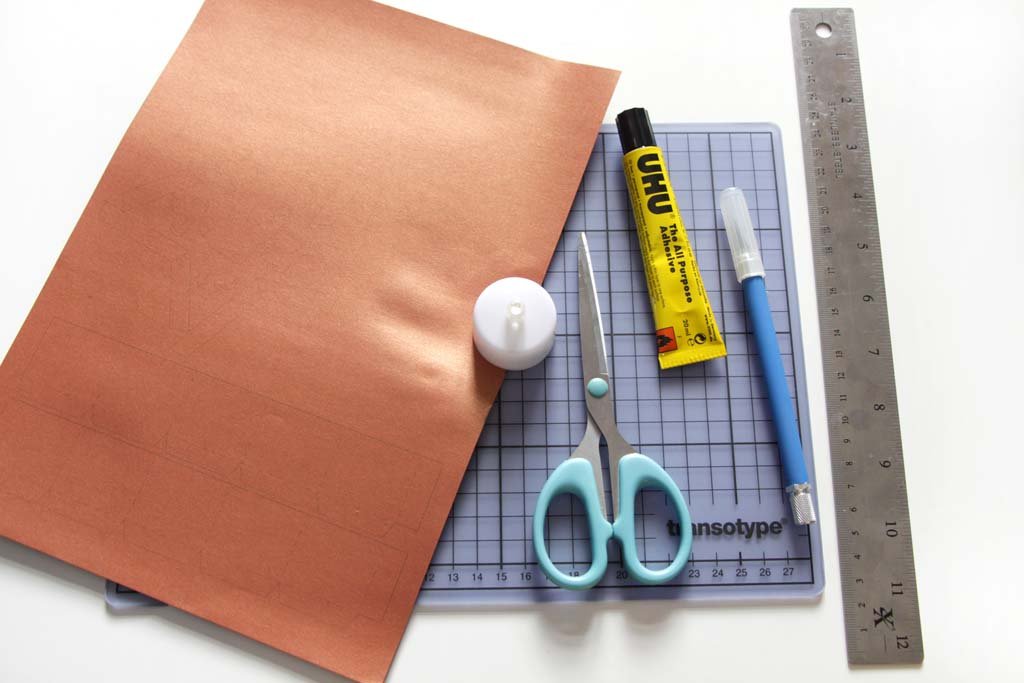
Christmas bauble make December 16, 2018 09:36
Here's a quick and easy Christmas bauble make for you!
You will need:
Thick paper or card
Pritt stick
String or thin ribbon
Either sharp scissors or a scalpel and cutting mat
This template
Optional
Glitter or glitter glue
2 beads with a large central hole
How to:
Cut out 6-10 paper bauble pieces using the template
Fold each one in half
Put a line of glue along the fold on the outside
Stack the folded pieces on top of each until you have a good stack.
Lay your string or ribbon along the fold (add the beads top and bottom if you have them)
Open out your bauble and stick together the two sides.
If you want you can apply glue to the paper edges and roll in glitter
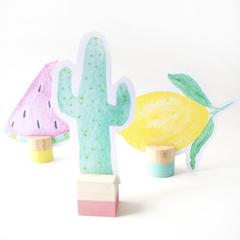
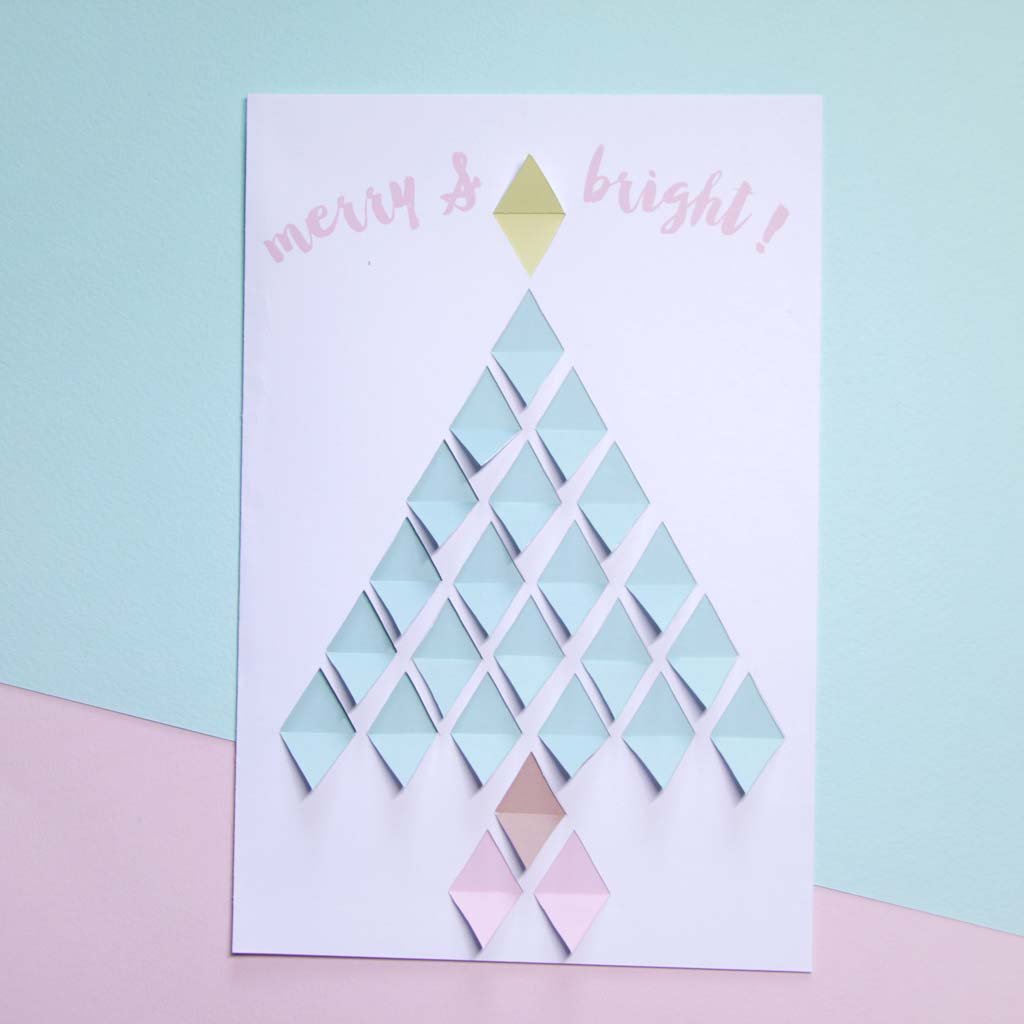
Christmas Tree free printable by Hannah from Utensils0 December 15, 2018 14:59
This Christmas if you're looking a little extra detail, what about this sweet, modern Christmas tree printable by botanical paper artists Hannah Miles of Utensils0?

Batty For Halloween October 6, 2018 22:06
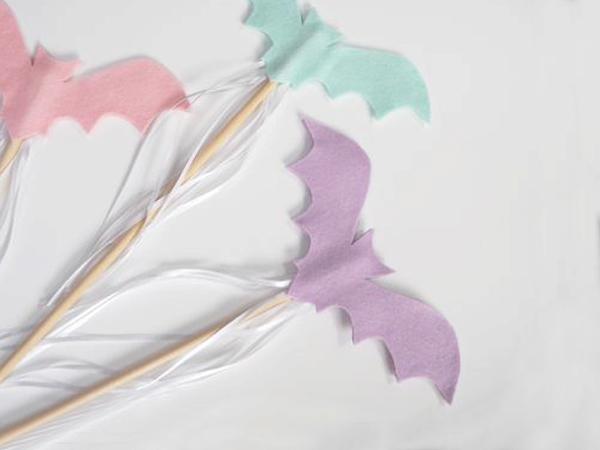
 Halloween may be our favourite time of year, but that doesn't mean it's all fun and games and fake blood. Throwing the Halloween party of the century can take up all your time (and money) if you're not careful. So we have created four speedy and thrifty craft projects using one simple Halloween shape - the classic bat. If bats aren't your thing you can choose any shape you like, just make sure it's easy to cut out so you can rope the kids/your friends/the neighbours into helping...
No party is complete without decorations, so we whipped up some spooky garlands to hang around the house. Cut bat shapes (or whichever shape you've chosen) from sheets of coloured or patterned card. We chose silver glitter card because who doesn't love an excuse to make everything glittery? Punch holes in your card shapes, and string together with thread, ribbon, or anything you have handy!

Forgotten the party favours? Don't worry, we've got you covered with these DIY felt bat wands. Cut two bat shapes from your felt and glue together with a wooden stick and lengths of ribbon sandwiched between them. Remember, bats don't just have to be black - we love using pastel colours for Halloween to mix things up a bit.
The devil is in the detail (too many Halloween puns?!) when it comes to throwing an epic party, so make sure even your drinks are scary with these easy peasy decorated cups. Grab some plain glasses or glass bottles, and decorate with mini bat shapes cut from self adhesive vinyl. Add a coloured straw and it's ready to fill with your potion of choice.

And finally, it wouldn't be Halloween without a spot of trick or treating, so make sure your little monsters have something to carry their swag home in. Our DIY treat bags are decorated with bat shapes cut from iron on vinyl - cut out and use your iron to stick them to the fabric. You could even personalise with their names!

So there you have it - four super quick Halloween DIYs to save your sanity, that are easy on the old bank balance too. If you make any of them we'd love to see your photos - tag us @londoncraftclub and we will share some of our favourites. Happy Halloween and Happy Craftoween everyone!
Download the free printable Halloween mask October 6, 2018 22:06 2 Comments
 To make this spooky Halloween mask, designed by Hannah from Utensils0, you will need:
This pdf template printed onto A4 white paper
Black card
Masking tape
Double sided tape or glue
Invisible tread
Ribbon
Scissors or Scalpel
Optional hole punch

1. Cut roughly around the mask and masking tape it to the black card
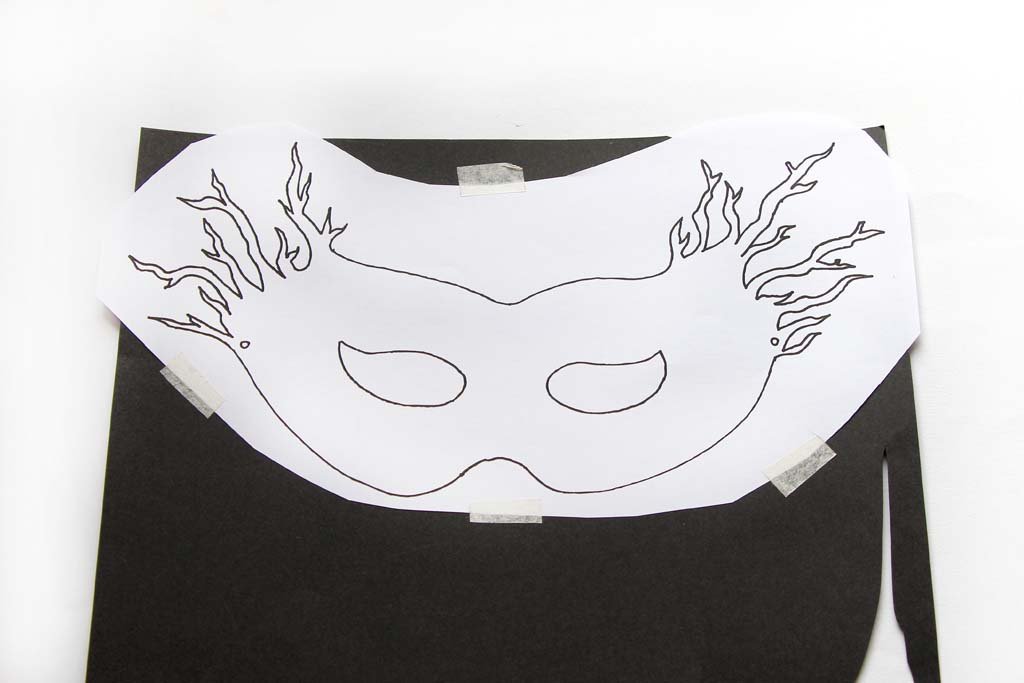
2. Using scissors or a scalpel cut through both the template and the card at the same time

3. If using scissors lightly fold it over to cut the eye holes. Use a hole punch to punch out the ribbon holes. Alternatively use a scalpel to do it all.

4. Masking tape the bat template to the black card and cut around them.

5. Fold and shape the wings of each bat

6. Using double sided tape on the back of the bat you can stick them onto the mask where you like.

7. You can also stick some invisible tread to the back of the bat and seal it in with a small piece of card, and using double sided tape where you want the bat to hang from.

Go scare people!!! I love love love Halloween, it's the one time we can really go for it with the dressing up and the decoration. What do you do at Halloween? Are you doing a scary doorway for Trick or Treating? Got any tips or ideas to make it really spooky? Would you make this mask?

Spooky Halloween printable by Utensils0 October 6, 2018 22:04

October is the month where the online community is split into two groups; those that are obsessed with all things Halloween, and those who aren’t. Here at London Craft Club HQ we have been pinning Halloween inspiration, and plotting our trick or treating costumes since July, so it’s no secret which group we fall into.

But today is the first day of October, which means it is officially Halloween month, and we are allowed to kick our Halloween obsession into gear at last! So to celebrate our favourite holiday of the year we have a totally FREE Halloween-themed printable to help you get into the spirit (get it, spirit?!) of things with us. Click here to download it

Created by our resident paper artist (and fellow Halloween lover) Hannah Miles, each sheet contains a selection of hand drawn images for you to print out and use as you wish. We turned ours into spooky straws, ghoulish garlands, and wicked window decorations. But why not get creative and see what you can create. Halloween cards or party invites perhaps? The printables are the perfect beginners craft project - no crafting experience required! All you need is some white card, a printer, and a pair of scissors. Even the kids can get involved (be sure to supervise little ones when using scissors.)

We hope you’ll love using our free printables – if you make something using them then we’d love to see your photos. Be sure to tag us on social media (we are @londoncraftclub) so we can see what you’ve been making!

Summer printables roundup June 17, 2018 07:00
Our lovely Hannah has made us tons of printables over the past few years - here are the best of the Summer ones!
 |
 |
 |
 |
 |
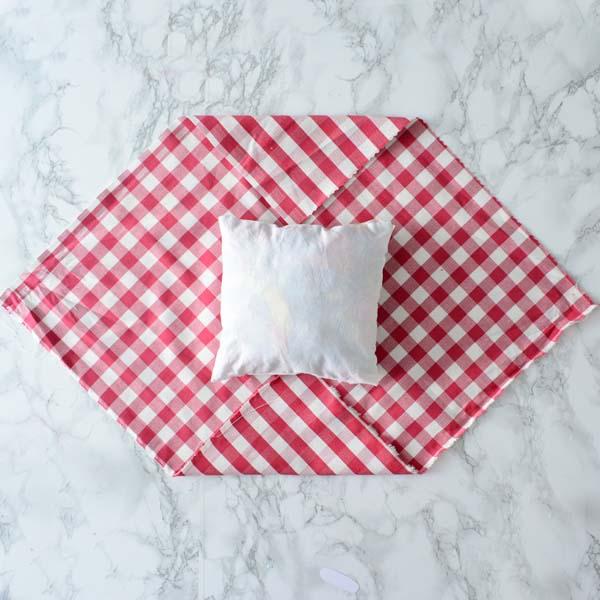
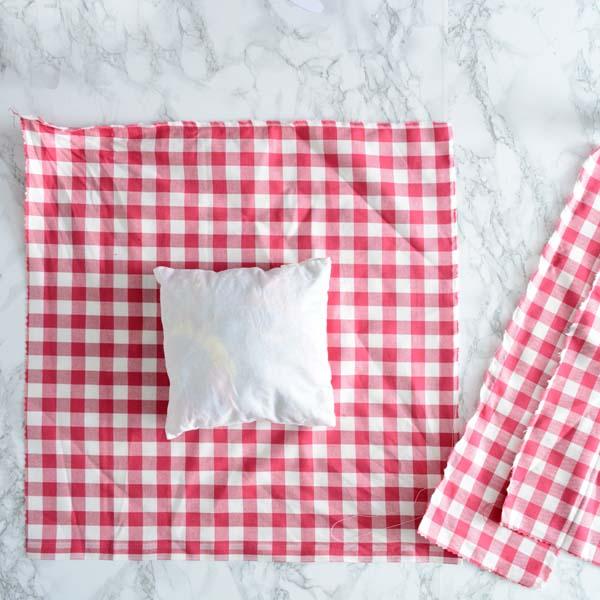
Quick easy no-sew cushion May 25, 2018 00:33 4 Comments

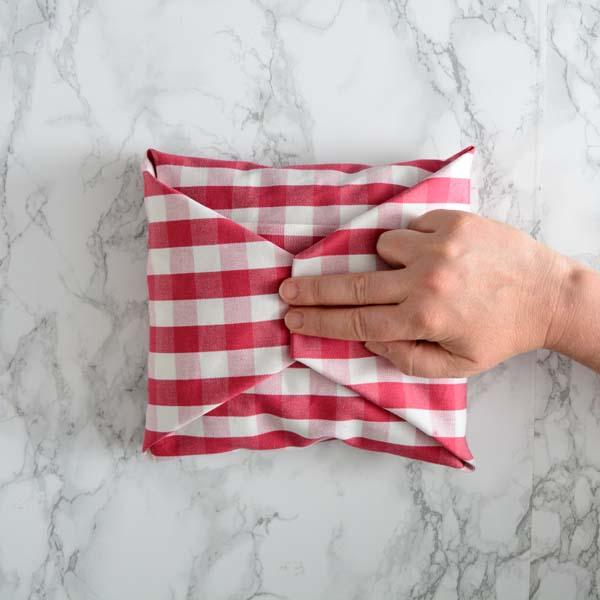
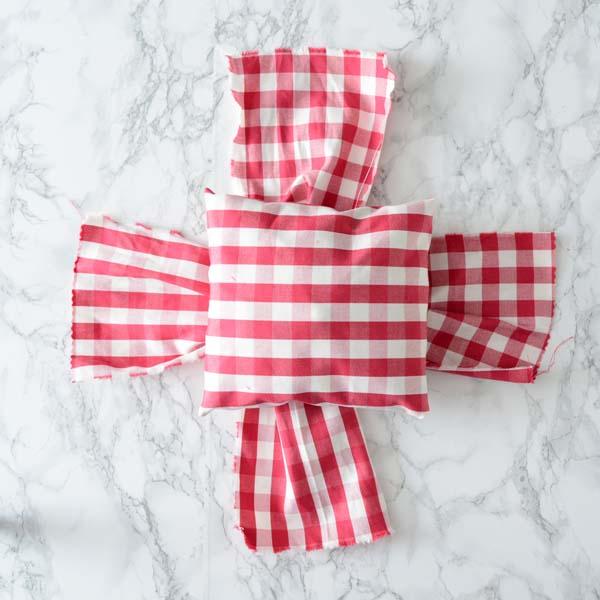
Try this really quick no-sew cushion cover you can make with a metre square of fabric. You can use a dress with a pretty print that's doesn't fit, or any nice piece of fabric you like.
Step1:

Step 2:
Step 3:

Step 4:

Step 5:

Step 6:
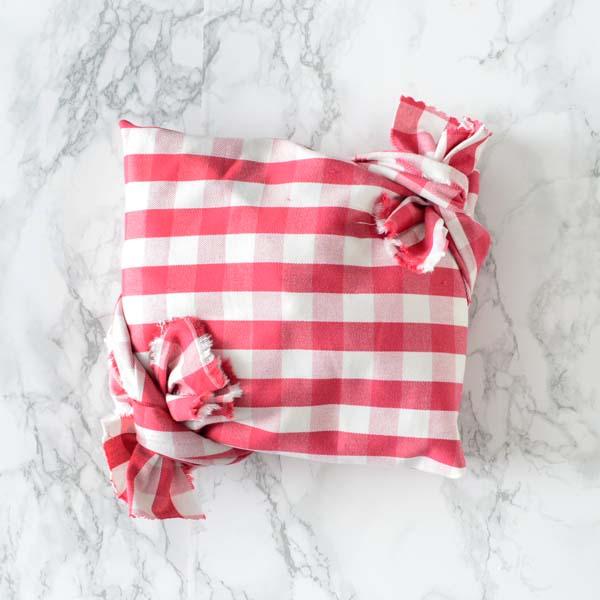
The finished cushion:
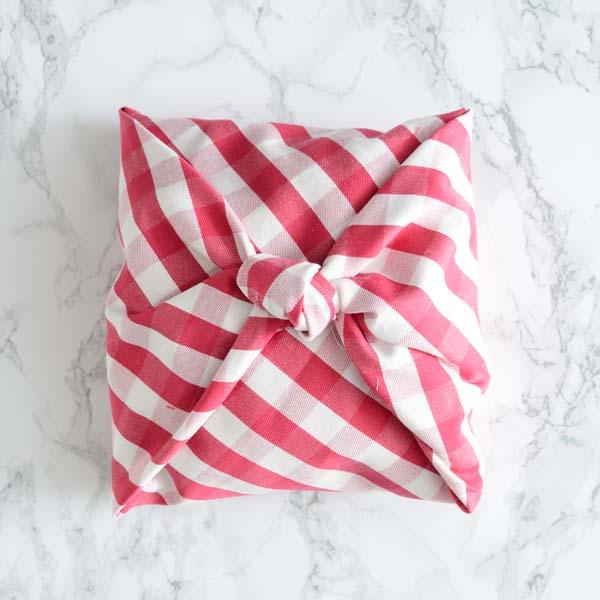
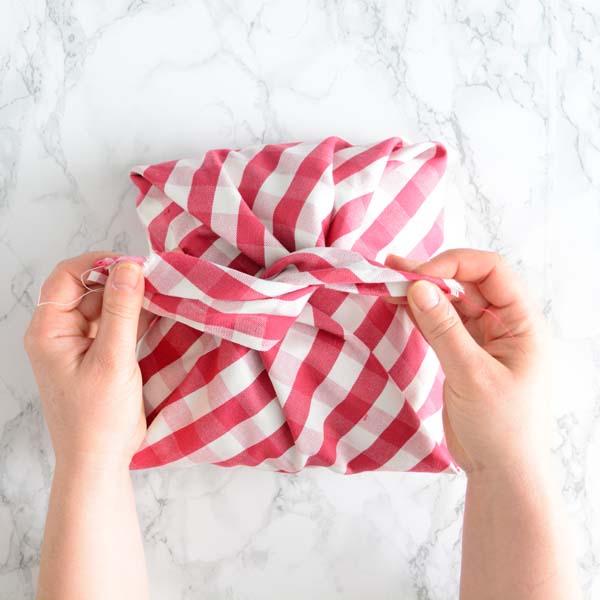
After this one, we've tried a new variation that Amber invented:
Step 1
Step 2:
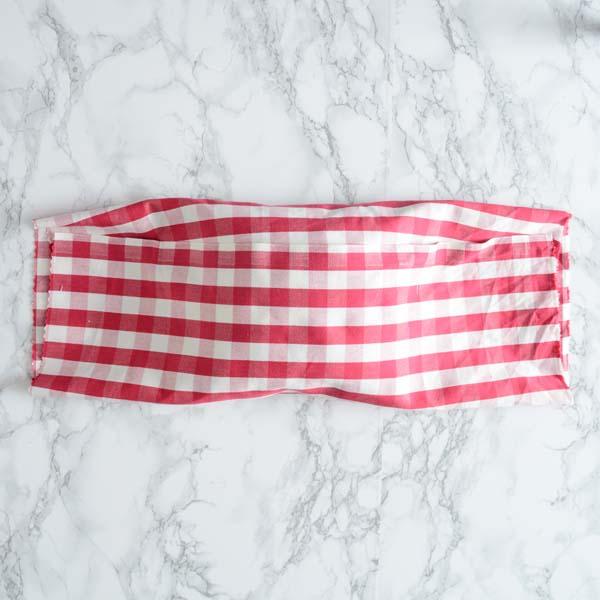
Step 3:

Step 4:

Step 5:
Step 6:
Step 7:
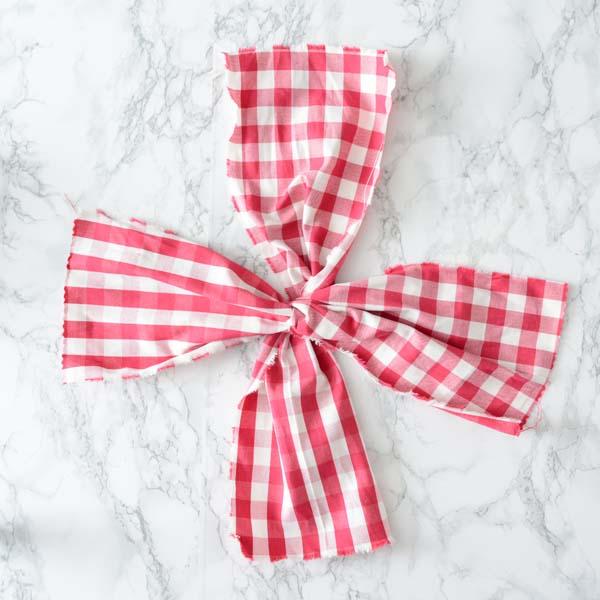
This works well if you tear rather than cut the fabric, so you get a nice frayed edge that you pull excess threads away from.
We hope you try them out!
Step 8:
Our next post is a no-sew sleep mask, so check that out next. Would you like to see our lovely tote bag no-sew make next week? Here's a peek...

Here's our scrapbusting no-sew sleep mask project May 24, 2018 07:00
 Recently we were challenged to make a bunch of stuff out of fabric without using any needles. Here's one of the many projects we came up with - it's a ten minute job max, and needs a dark fabric, a decorative fabric, pinking shears, a bit of ribbon and some Bondaweb. Here we go:
You will need

About Bondaweb
It looks like a sheet of very fine gauze, and has comes with a white backing paper a bit like baking paper. It melts into a glue when hot. Take off the white backing paper, and just lay the gauze between to layers of fabric. Then iron slowly, with no steam, using a pressing rather than a rubbing motion. The gauze melts and bonds the layers together. Make sure no Bondaweb is showing between the fabric layers, as it will ruin your ironing board and your iron! If in doubt, sandwich the fabric between the white backing paper, which can be ironed, to protect the iron and board. When it cools, the glue sets and your fabric is stuck together. It's also a bit stiffer, and it wont fray as the glue has stabilize the edges. Super handy stuff!
Step 1
Use the Bondaweb to bond two layers of your darker fabric together. Make sure the pretty side is showing on one side, and the back of the fabric is showing on the other (for those who sew - it's right side to wrong side)

Step 2
Now bond the second fabric onto the dark fabric. Make sure the pretty side of the fabric is showing, so both sides of the mask have the good side of the fabric showing. (Wrong side to wrong side)

Step 3
Cut out your sleep mask. Pinking shears give a nice zigzag finish, and the fabric shouldn't fray as the Bondaweb will have sealed the edges

Step 4
Fold the eye mask in half lengthwise and snip a little triangle out where you want the hole for the strap to go.

Step 5
Add the ribbon

The finished mask is reversible

Quick, super hand and great for using up scraps!
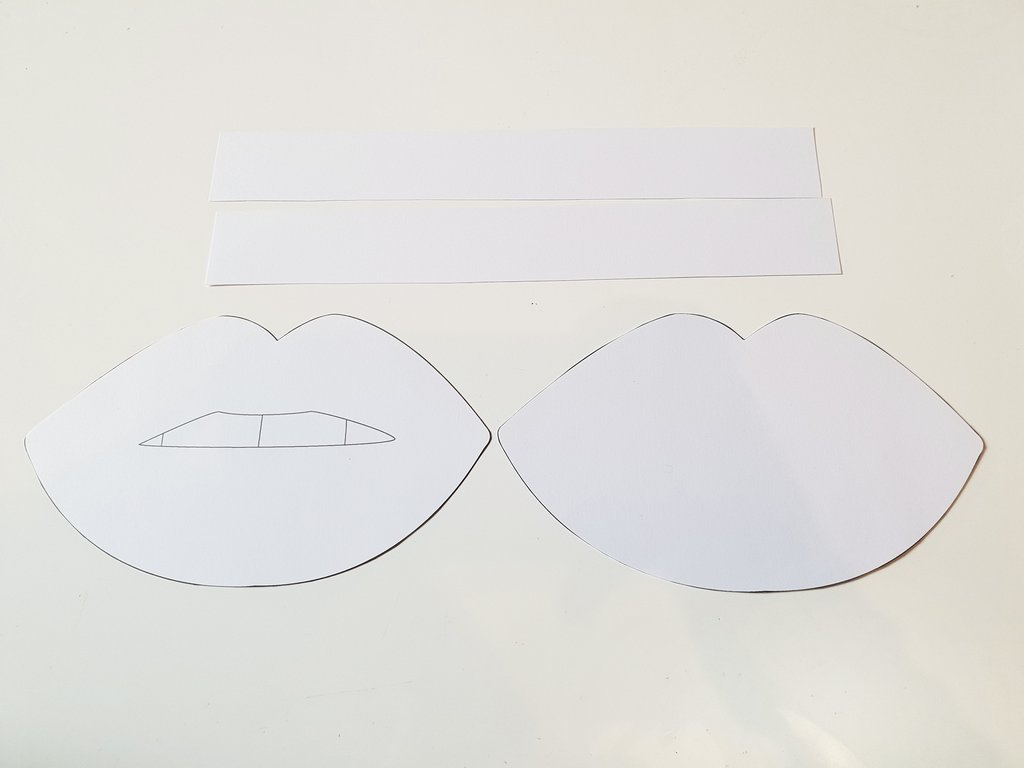
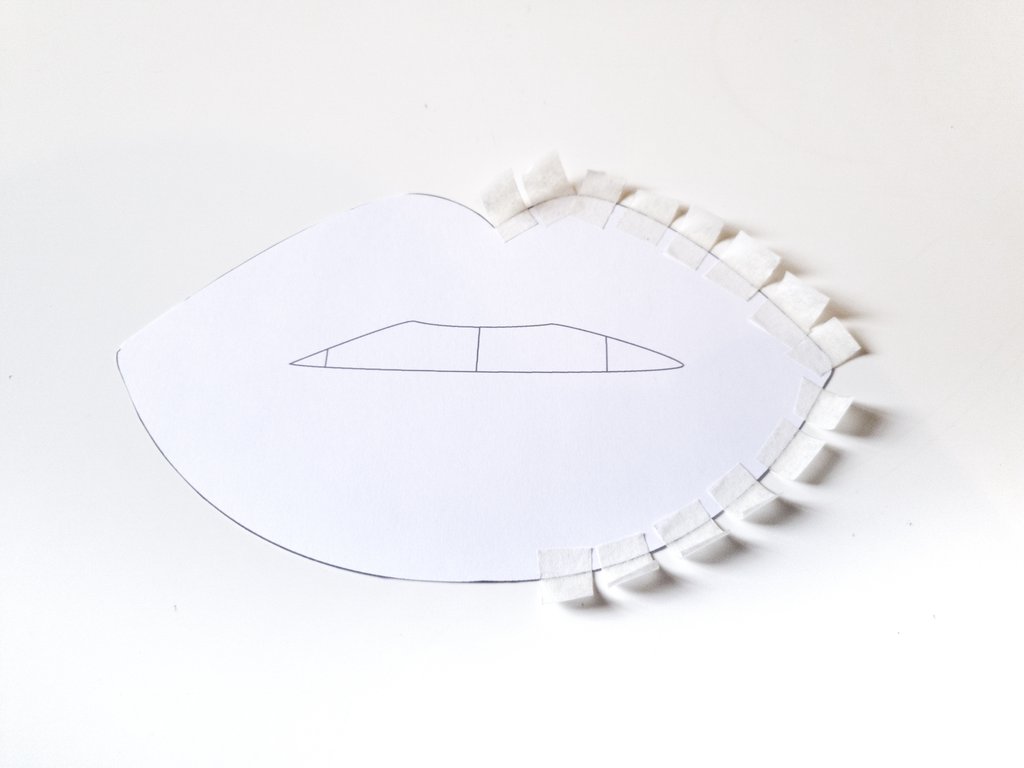
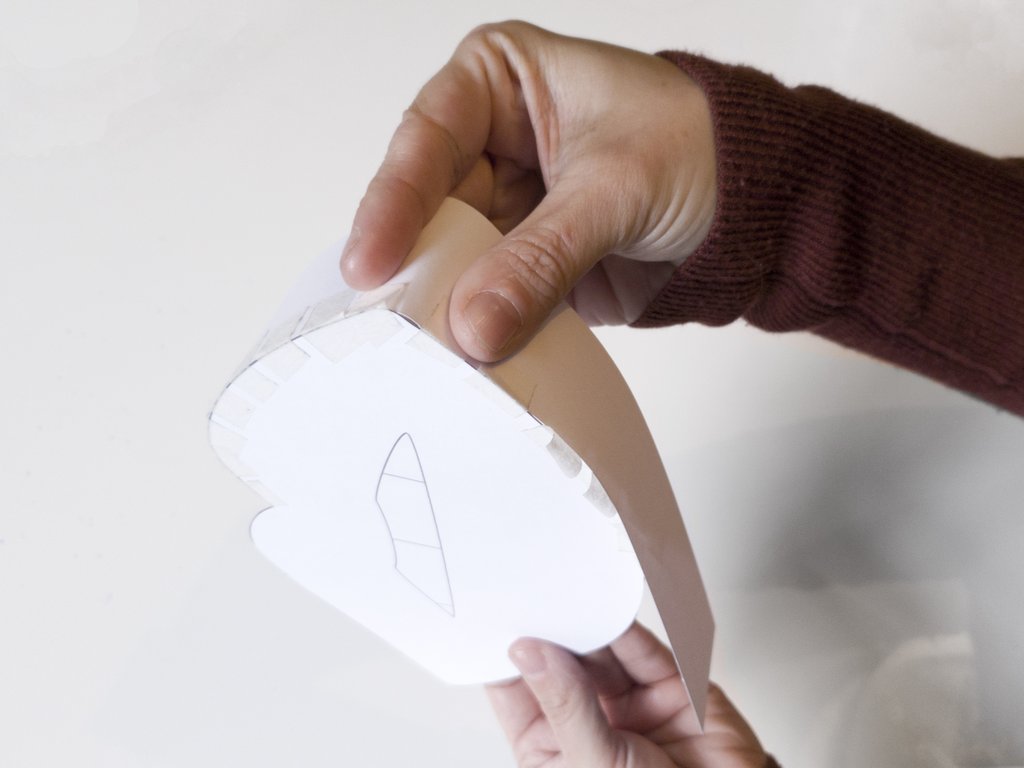
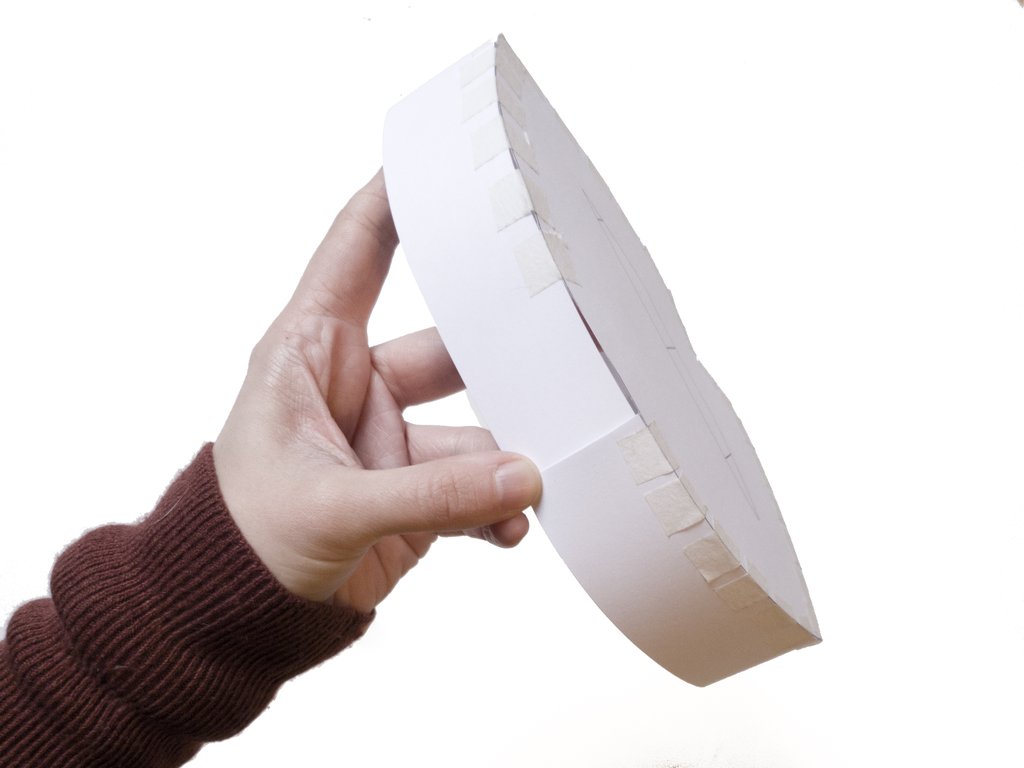
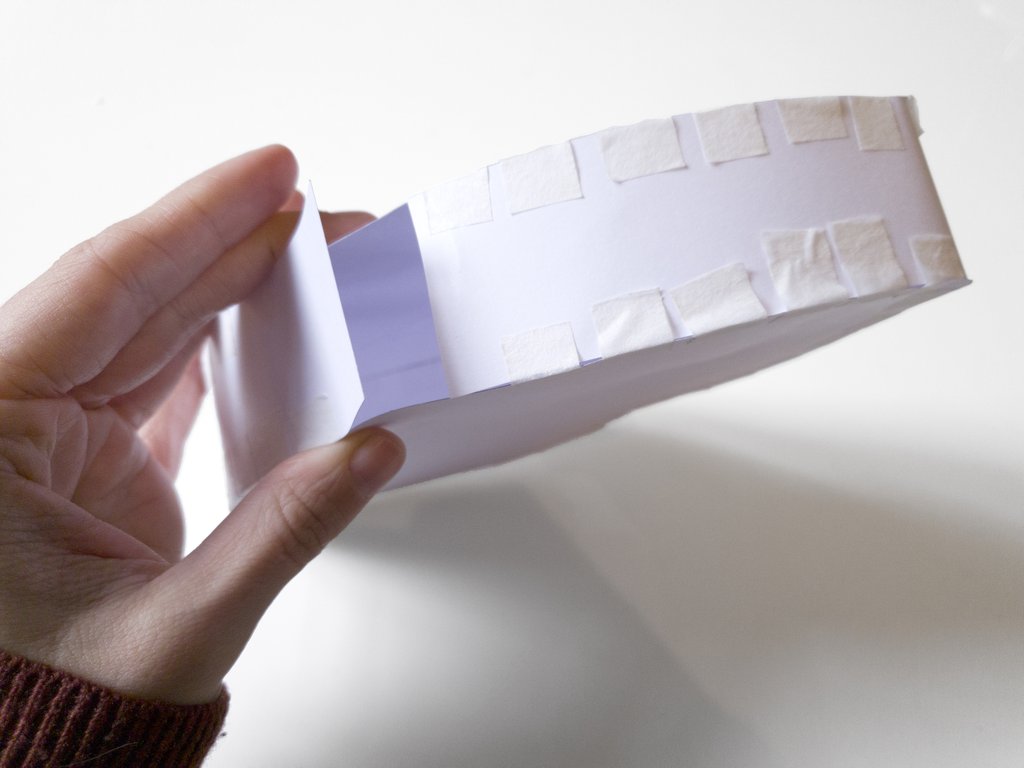
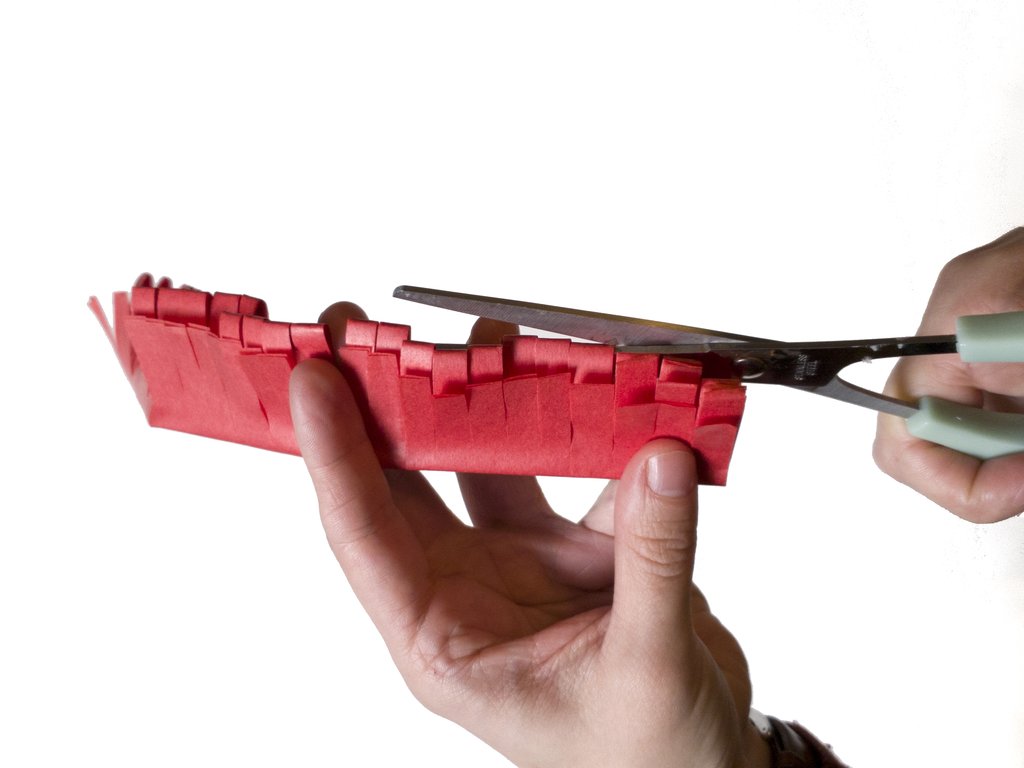
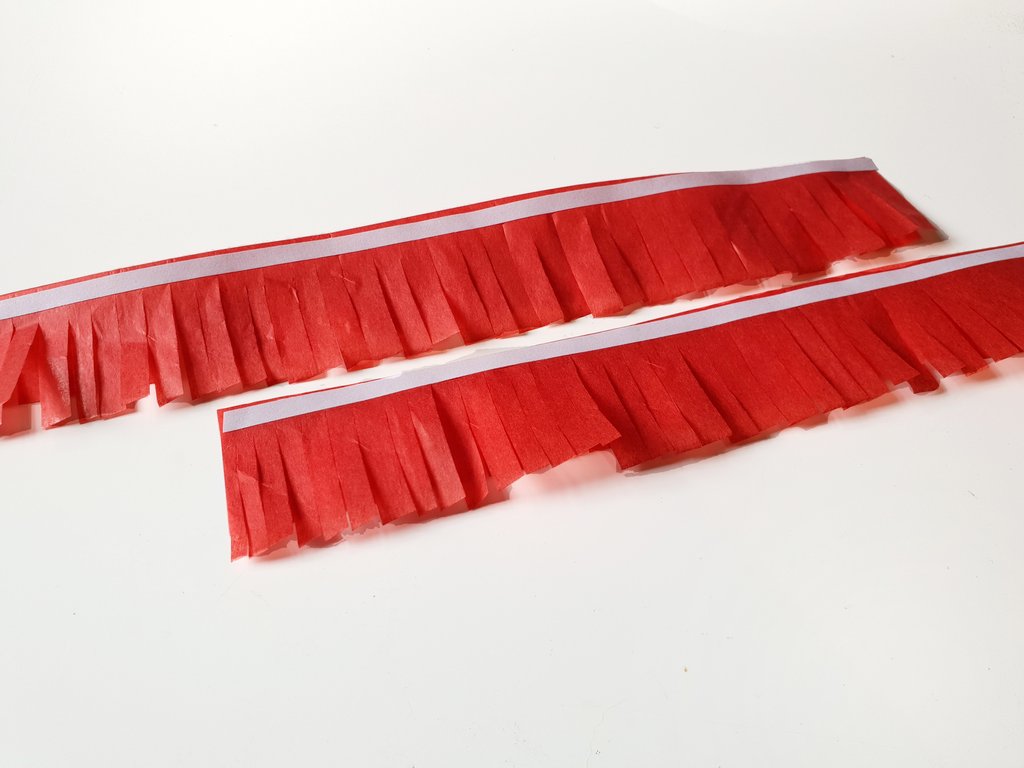
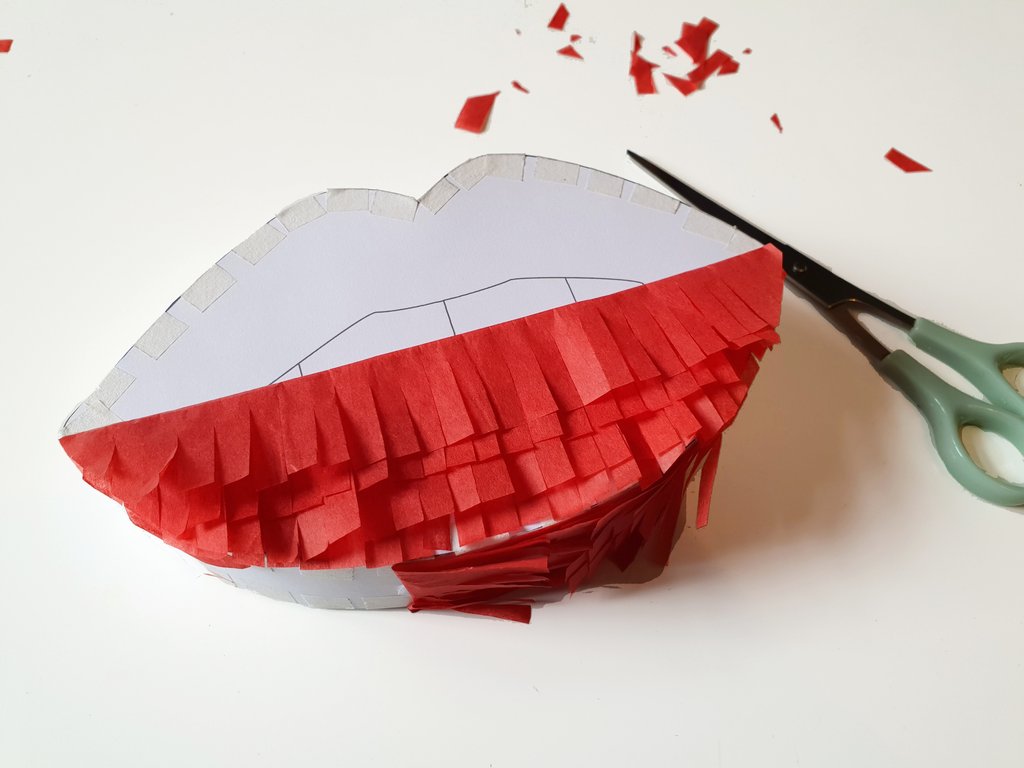
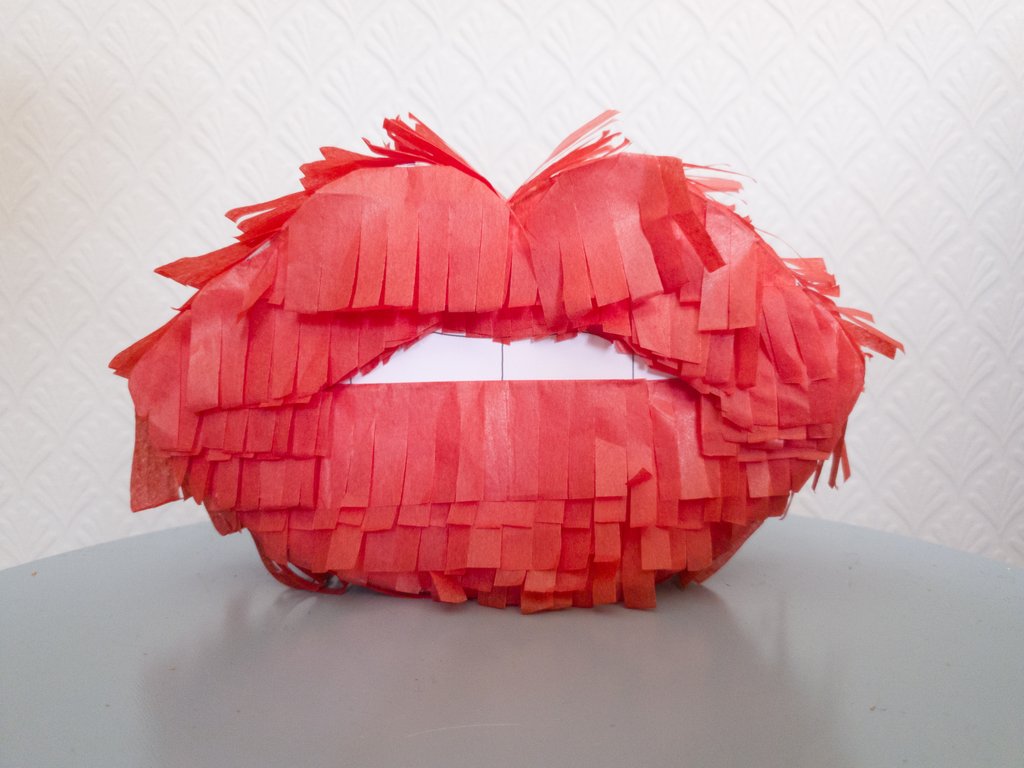
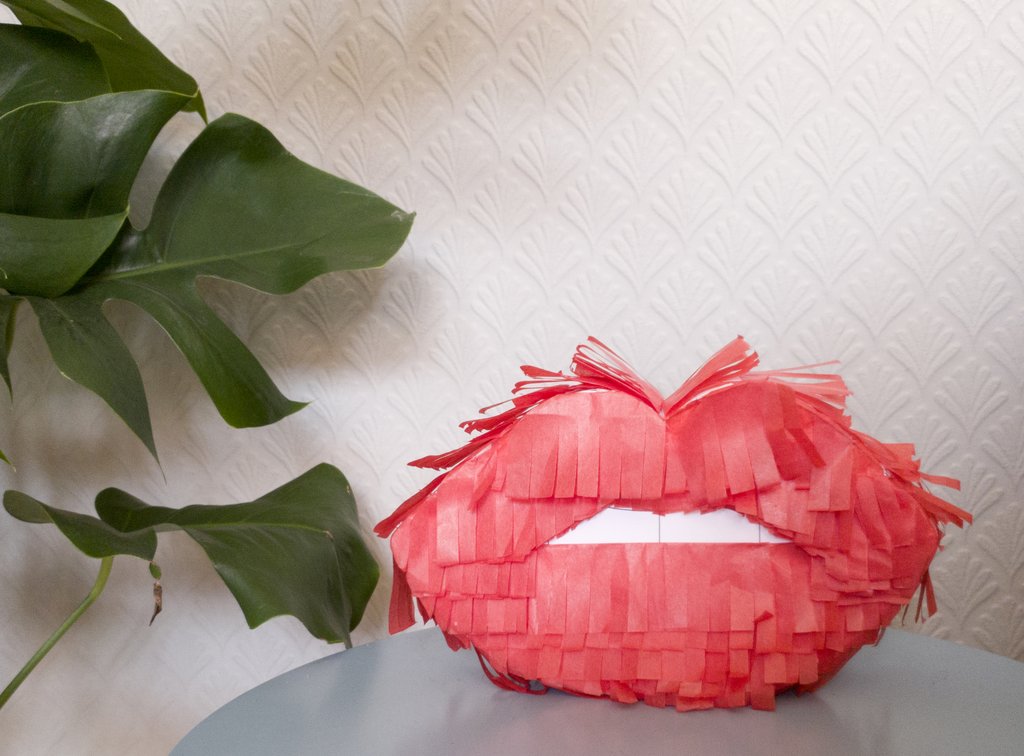
Try this Lips Pinata DIY April 7, 2018 23:17

Colourful Inksplash Gift Tags DIY February 13, 2018 00:00
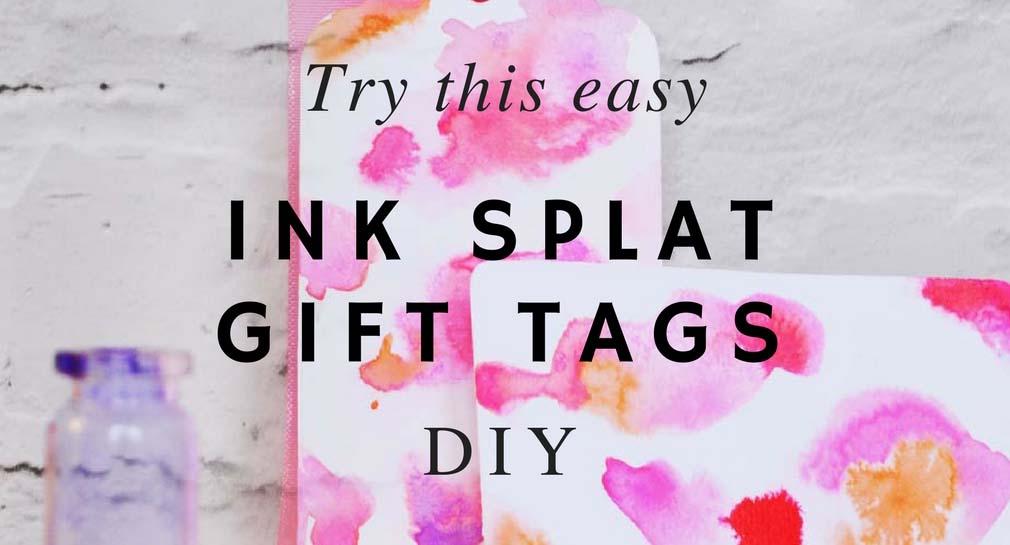
Here's a quick DIY I did when I was tidying up after a Brush Lettering workshop. We use a ton of lovely colourful inks, and gorgeous water colour paper, so this is a great way to use up left over materials: Here we go:
You will need:
- Our gift tag printable on thin plain paper (Download it here)
- Watercolour paper
- Scissors
- Three coloured inks
- painbrush with a pointed end (you get one like for free in our Brush Lettering workshops)
- ribbons
- masking tape
- you might need a little kitchen paper

Step one:
Roughly cut out the templates - but don't cut right up to the line
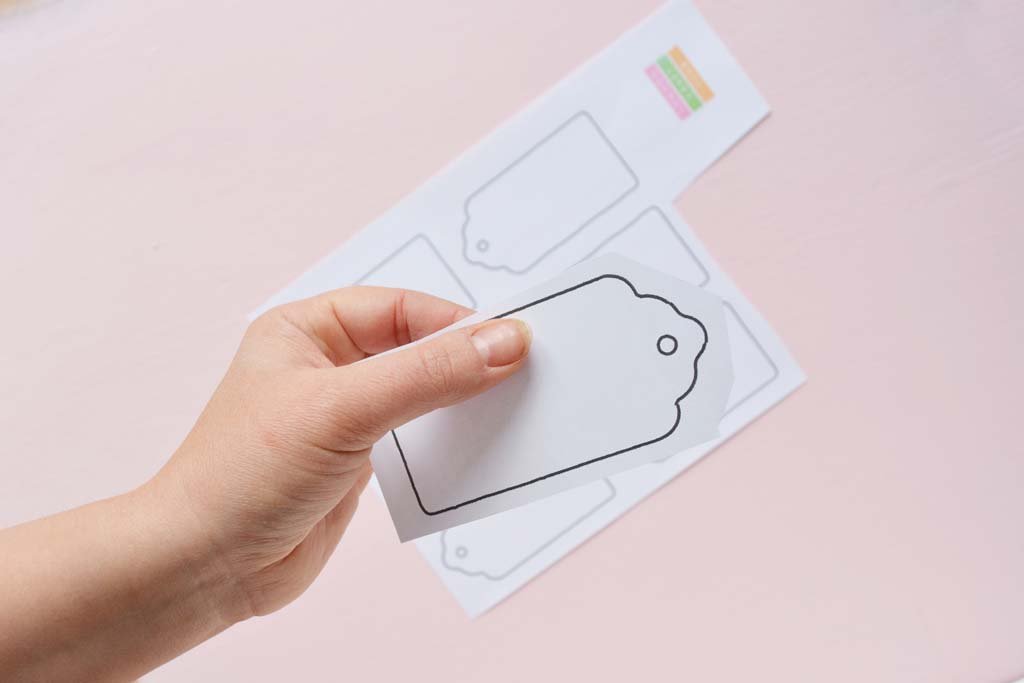
Step Two:
Stick the template on the watercolour paper and then cut through both layers of paper

Step Three:
Punch a hole in the top of the tag
Step Four:
Paint patches of clean water onto the gift tag
Step Five:
When the water is still very wet, dip the tip of your brush in a colour, then dip just the tip of the inky brush into the water and watch it spread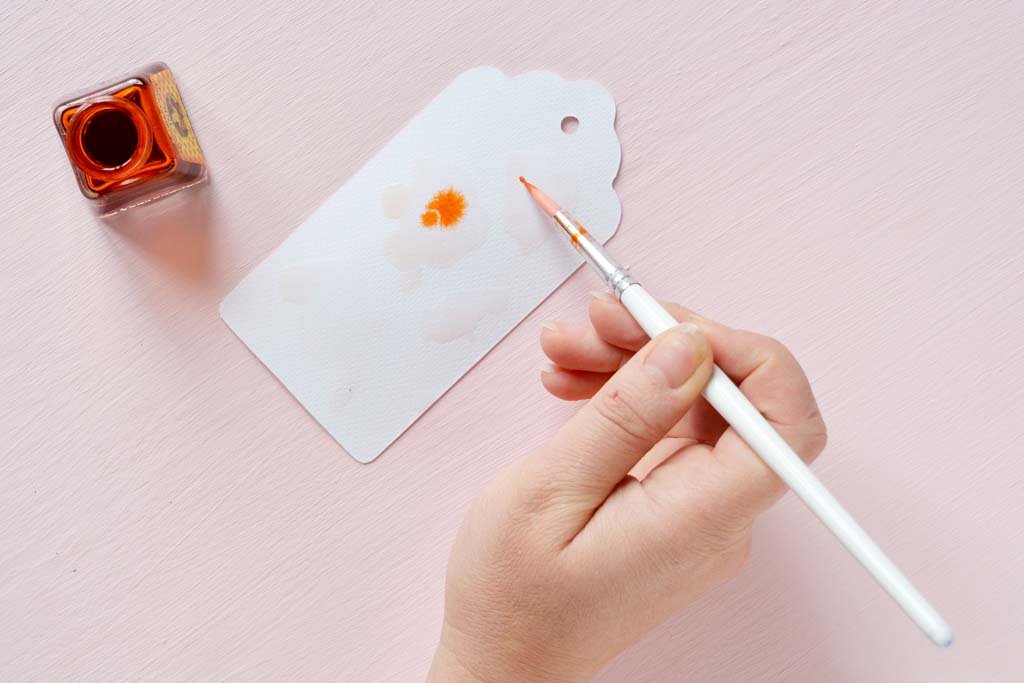
Step Six:
Repeat with more colours. If you put too much colour in, you can dab a little water away with kitchen paper.

Leave them to dry. If the paper curls up, lay a piece of kitchen paper over it and iron it on a medium heat with NO steam. Add your ribbons, and you're done!


Crafty Galentine's cards and more! February 4, 2018 10:18

It's time for waffles and cocktails! Galentine's Day is on the way and we've got some lovely printable cards for the crafty gals in your life - the printable is free, just scroll down. As ever it's designed by Hannah of Utensils0, our fave paper artist. And to top it off we've got a Pinterest board with crafty Galentine's ideas.
 You will need:
This pdf - download it and print onto card, at least 200gms
Scissors or a scalpel
Optional:
Bonefolder
Sewing Needle
Thread
Glitter
Glue
Print out the pdf onto card and cut along the black line to separate them

Fold the cards in half - use a bonefolder to get a really clean fold

You can gift them as they are or have the option to get crafty with them! Add some glue dotted around and sprinkle on some glitter or go ahead and do some cross stitching.
To cross stitch, first make the holes you'll stitch through. To do this, push the needle through the end of each cross.

Then thread up a needle and stitch your crosses. To keep the tail hidden, start by pushing up from the back to the front (making the holes in advance makes it a lot easier!)

How cute are they!

We'd love to see your versions if you make one! Tag us on Instagram @londoncraftclub
A free Puffin printable for Bird Day! January 5, 2018 00:00
 It's 5th January and it's Bird Day, which makes it the perfect day to share our gorgeous free printable by Hannah of Utensils0. Hannah chose a puffin for her printable, because they are on the endangered species list and they are a reminder that we need to think carefully about how we impact the lives and habitats of the animals we share the planet with.
So what can you do today to help celebrate Bird Day? Well you could do worse than put a bit of food out for your local birds so here's some advice from the RSPB about how, what and when to feed birds.


3. If you'd like to make gift tags use either washi tape or a hole punch to attach ribbon to the birds.


5 ways to forage yourself a DIY Christmas December 19, 2017 18:41
This year we have all been obsessed with plants - not just the super cool succulent thing, but the good old spider plant, ivy, cheese-plants, ferns... In fact all things green and growing have been sneaking into our houses everywhere. Pantone have even made Greenery their colour of 2017. And as Christmas trends are set in July, it's no surprise that this year it's been a foliage frenzy for Yuletide.
This is brilliant news, because I have saved a ton of money! And how often do I say that about crafting? Here's how:
1 - Midnight garden raids
I'm out at night nicking the deadhead hydrangeas up and down our street. One from each garden. No-one will notice. Shabby chic wreath on it's way
2 - Saving the garden fence
Ripping a lot of that dusty, cob-webby ivy off my poor garden fence is paying off because I'm bringing it indoors to wrap round all the banisters. I don't mind spiders
3 - Rosemary is impossible to kill
Yes, Rosemary, my one and only reliably alive garden plant that isn't a weed, just keeps on giving. Smells great, looks great, and keeps growing back
4 - Visits to the park with an ulterior motive.
I actually love standing around the adventure playground in the cold! Kids, you can help me carry all the tangly brambles and weird potentially poisonous berries home.
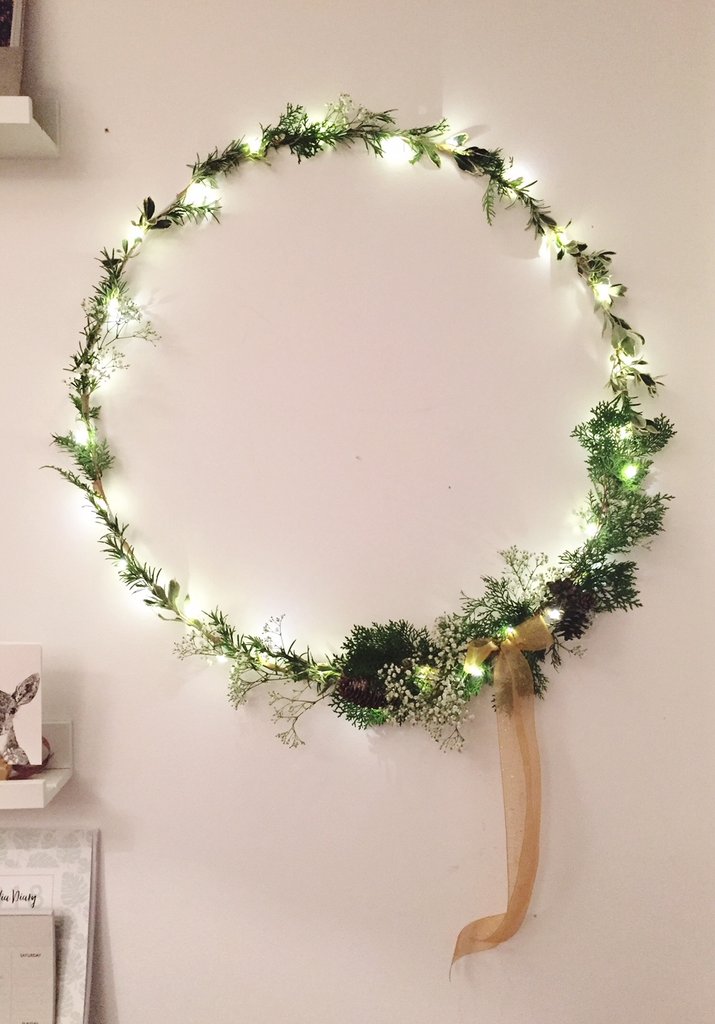
5 - Any old leaf will do
Yes, if it's green, red, blue or white, wrap it round an embroidery hoops with some of that not-actually-sticky florist tape and actually it's quite hard to go wrong. I happen to have a 3 foot wide metal hoop, and this took me half an hour using just bits from my garden and £2 worth of flowers. Because at the end of the day, leaves are really beautiful.
Here's my Pinterest board of foraged Christmas inspiration
Have you tried it? I'd love to see what you made. How did you avoid spiders and bits of bark all over the kitchen? Can you glue gun ivy? Let me know how it went or what you think!
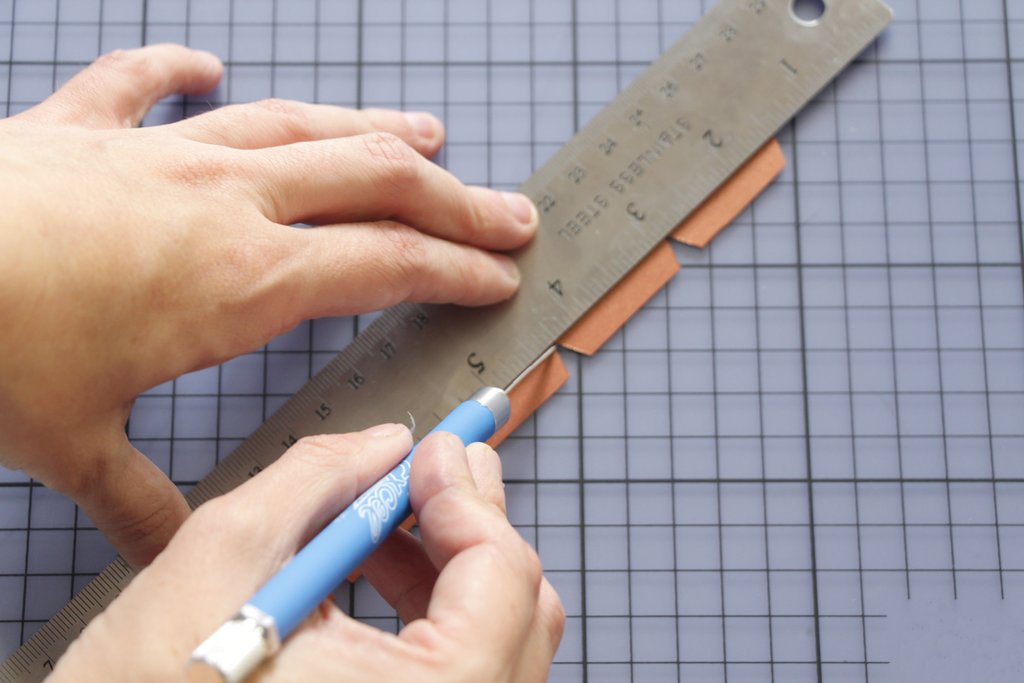
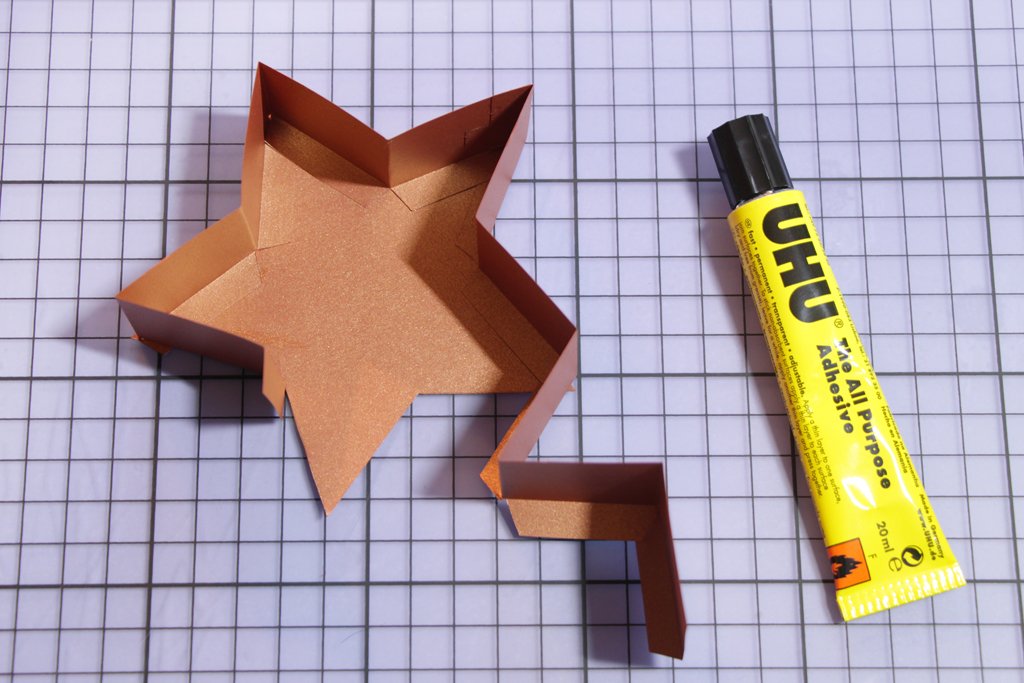
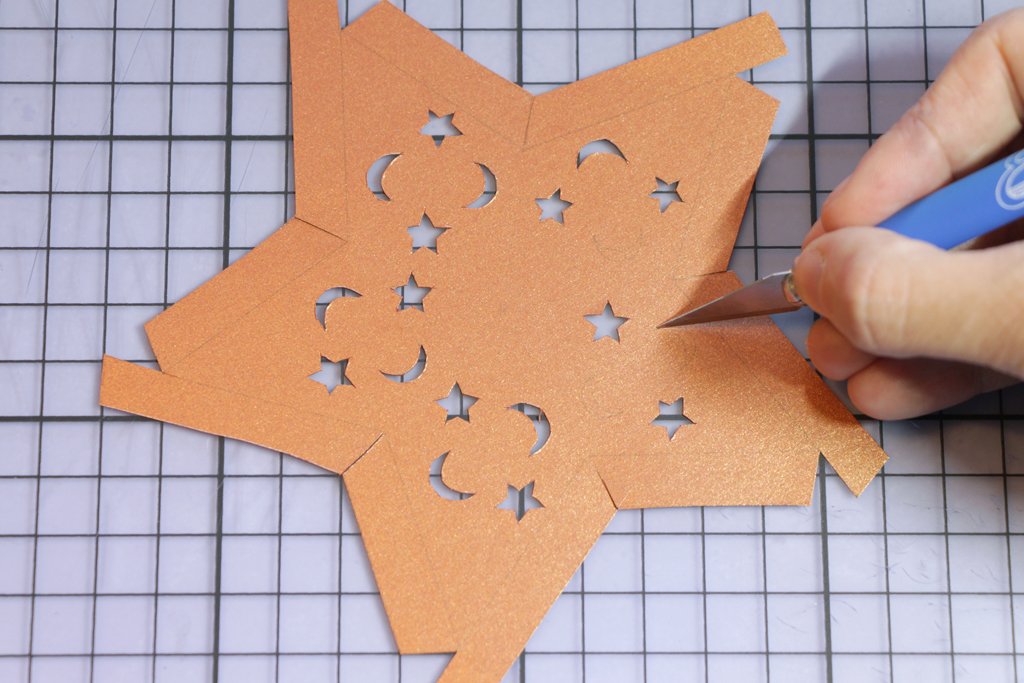
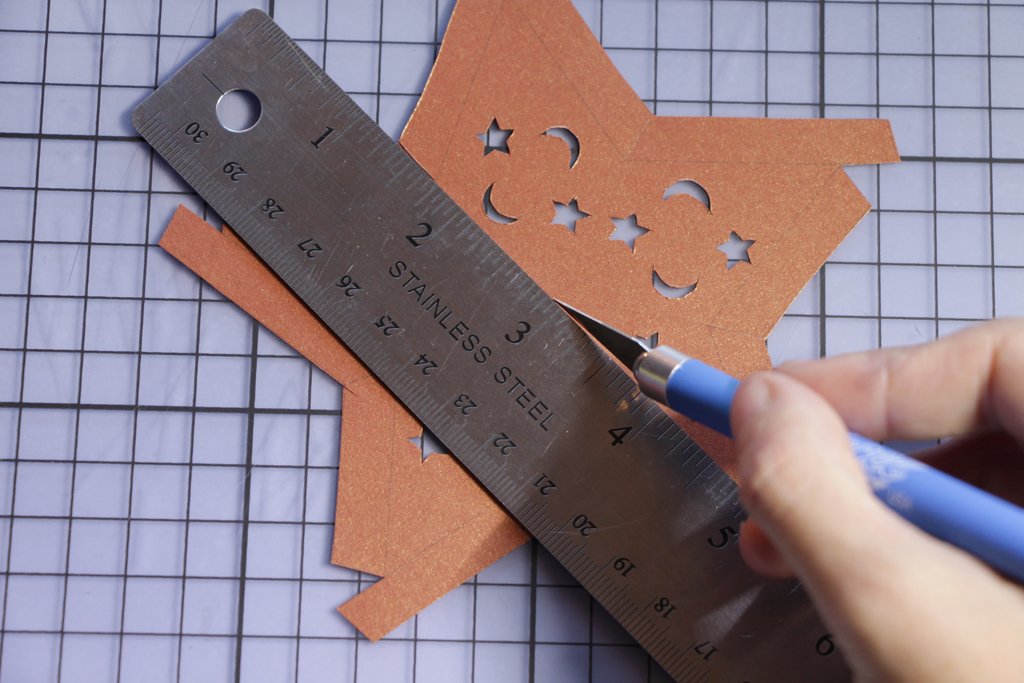
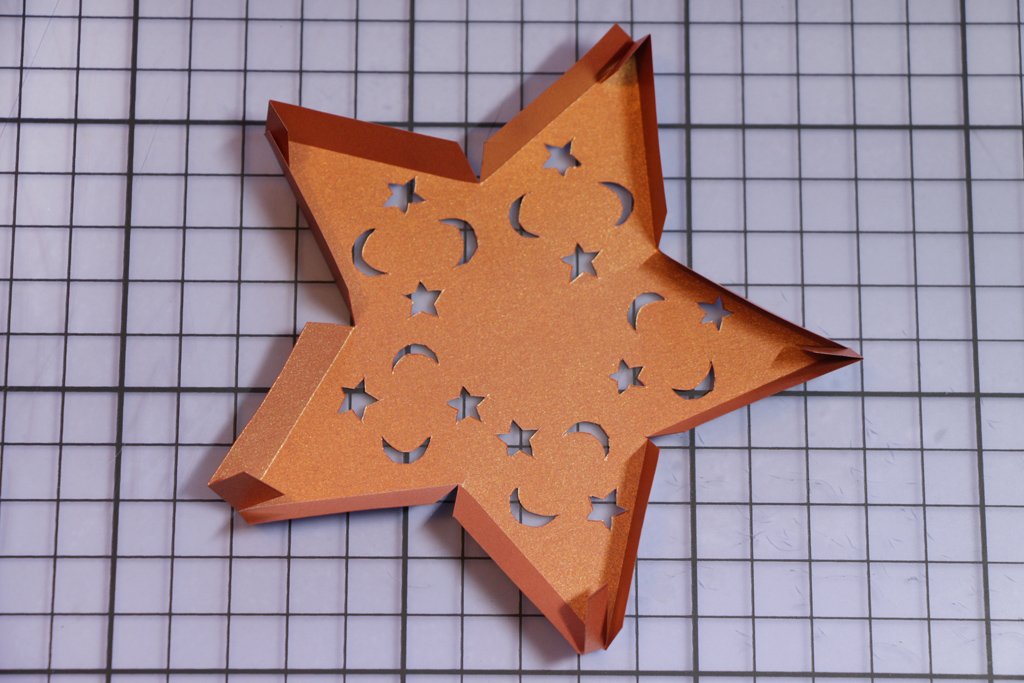
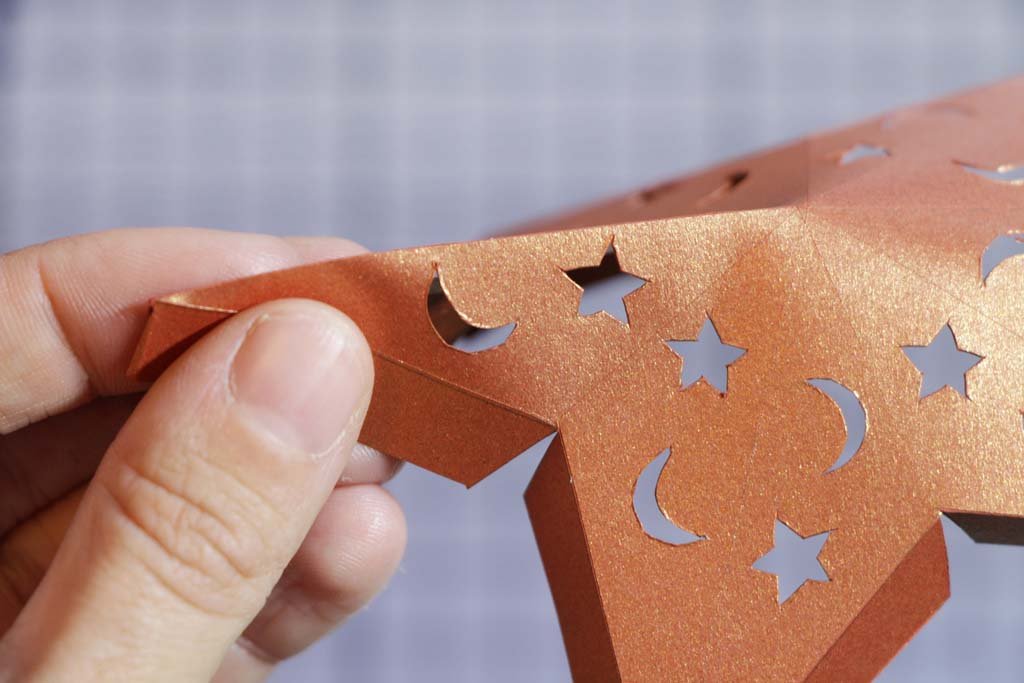
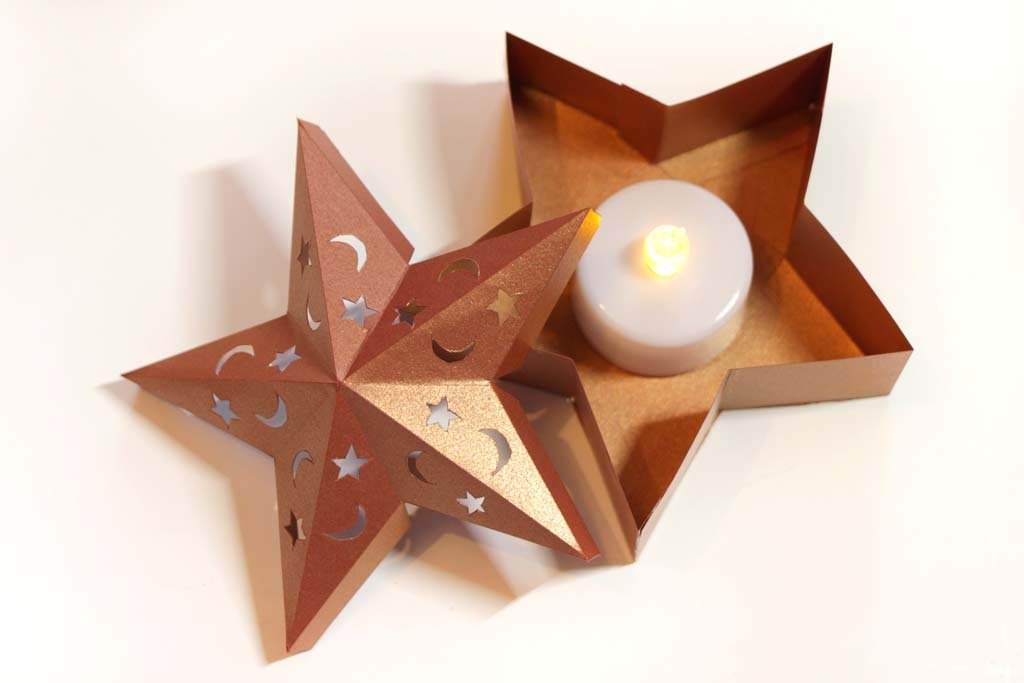
Download and make this beautiful Christmas luminary star December 16, 2017 03:54


Super sweet Advent Calendar by Utensils0 November 22, 2017 21:26

Download this adorable free desk calendar by Hannah from Utensils0


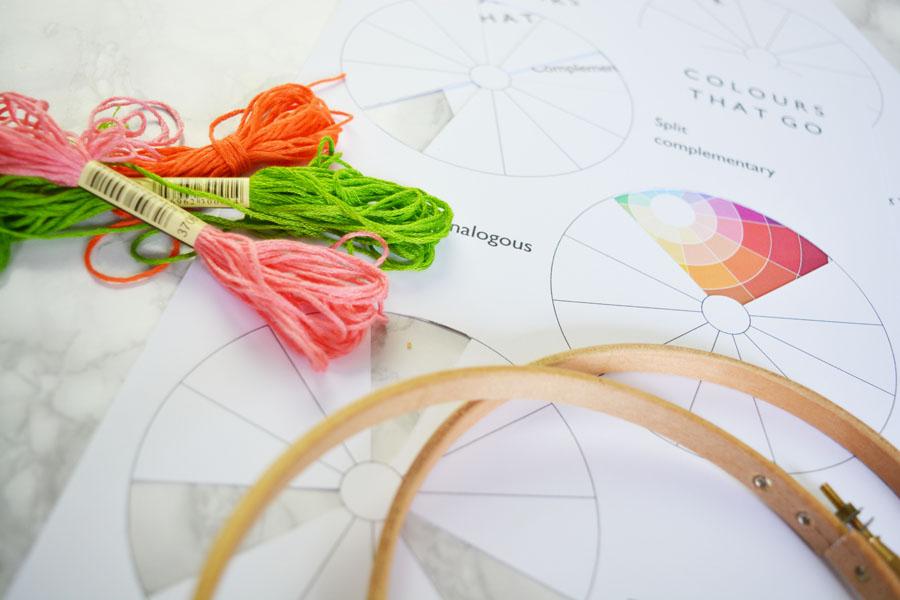
My free printable colour tool! November 17, 2017 19:35

If you've ever thought Colour Theory sounds a bit technical, don't worry! Here's a super easy tool I made that you can download for free. It uses different colour theories to easily throw up new and surprisingly good colour combinations.

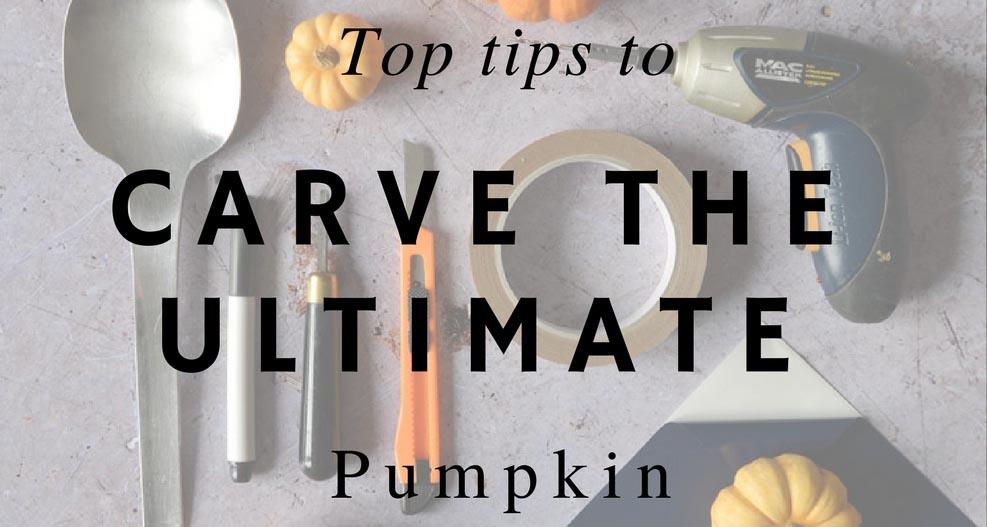
What they don't tell you about carving pumpkins October 29, 2017 10:28
 Halloween just isn't the same without pumpkins! Our top tips for carving pumpkins are
1. Get your kit ready. To go pro, you need a big bowl, a big spoon for scraping, a long craft knife, a lino cutting tool, a mini drill, a whiteboard pen and some sticky back vinyl for stencilling. That will cover all eventualities but of course one sharp kitchen knife will do...

2. Make the hole big enough
Sounds obvious but it’s easy to make it too small and then scraping it out is a nightmare. Use a whiteboard pen to draw it on if you have one handy

3. Scraping it out takes ages…. and ages
Scrape out the seeds, and if you’re industrious you can wash and roast them for eating. Then scrape out the pith. Scrape and scrape and scrape until you can just start to see the light of a candle through the skin.

4. You don’t need to cut all the way through
Lino cutting tools make the most beautiful lines in pumpkin skin. If you’ve scraped it out enough, then you won’t need to cut all the way through for the light to shine through and you can make lovely spooky designs. And if you do an “O” the middle won’t fall out

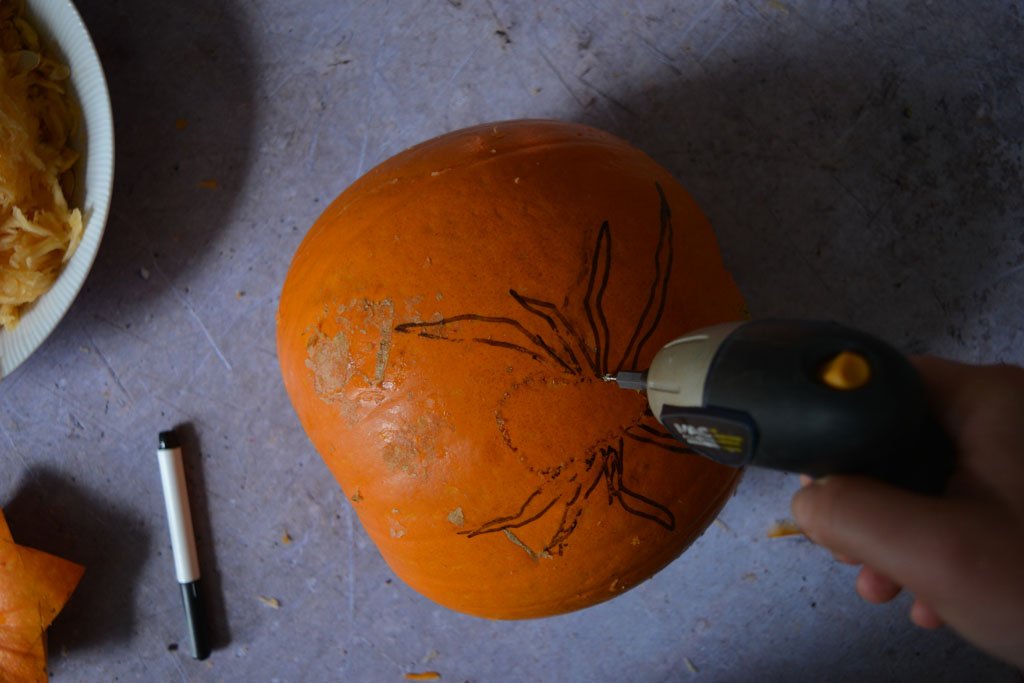
5. The ultimate tool is a mini drill
Draw or stencil on your design, then drill tons of tiny holes along the curves, close together. Then push the drill back into one of the holes, and push it gently sideways towards the next hole. Use your lino tool and long knife to mix up techniques to get perfect accuracy.
6. Spray the finished pumpkin with very diluted bleach to stop it going mouldy. Don't ice or refrigerate it, it wont help. Really, there's not much you can do to stop it suddenly going mushy and stinking, sorry.
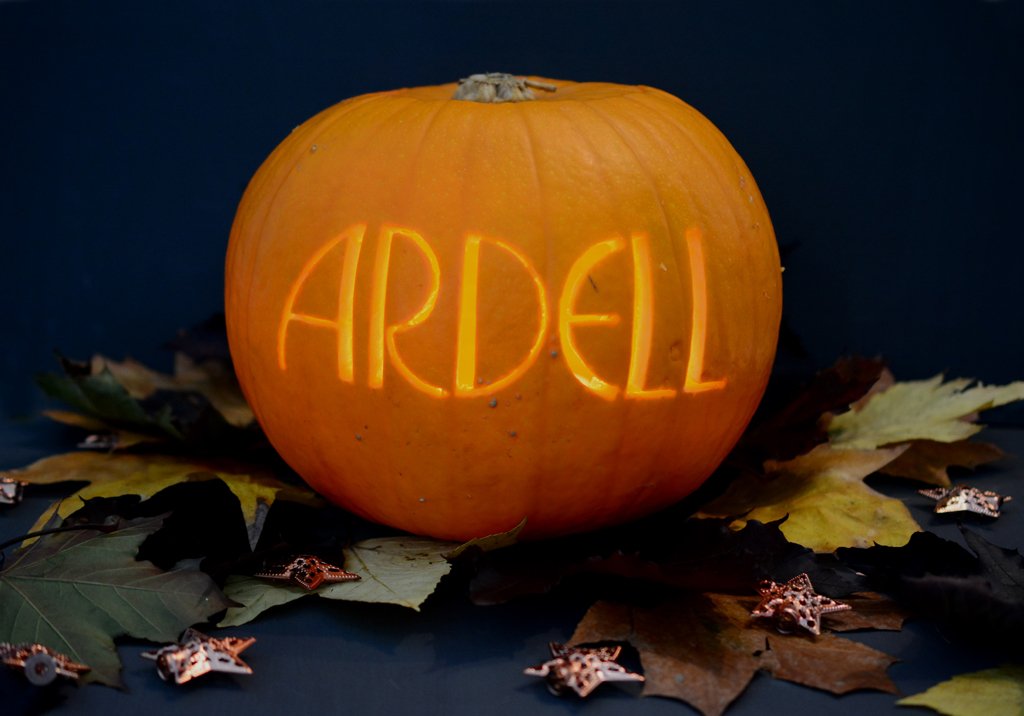
7. It does take a bit of practice!
But as an example of how accurate you can get, here's a pumpkin that we were comissioned to make for Ardell (yes, the lashes people)
We're not carving properly until Monday or Tuesday, so keep an eye on our Istagram and Facebook to see what we make. Are you going to be carving pumpkins? Let us see what you make, we love to see your handiwork!
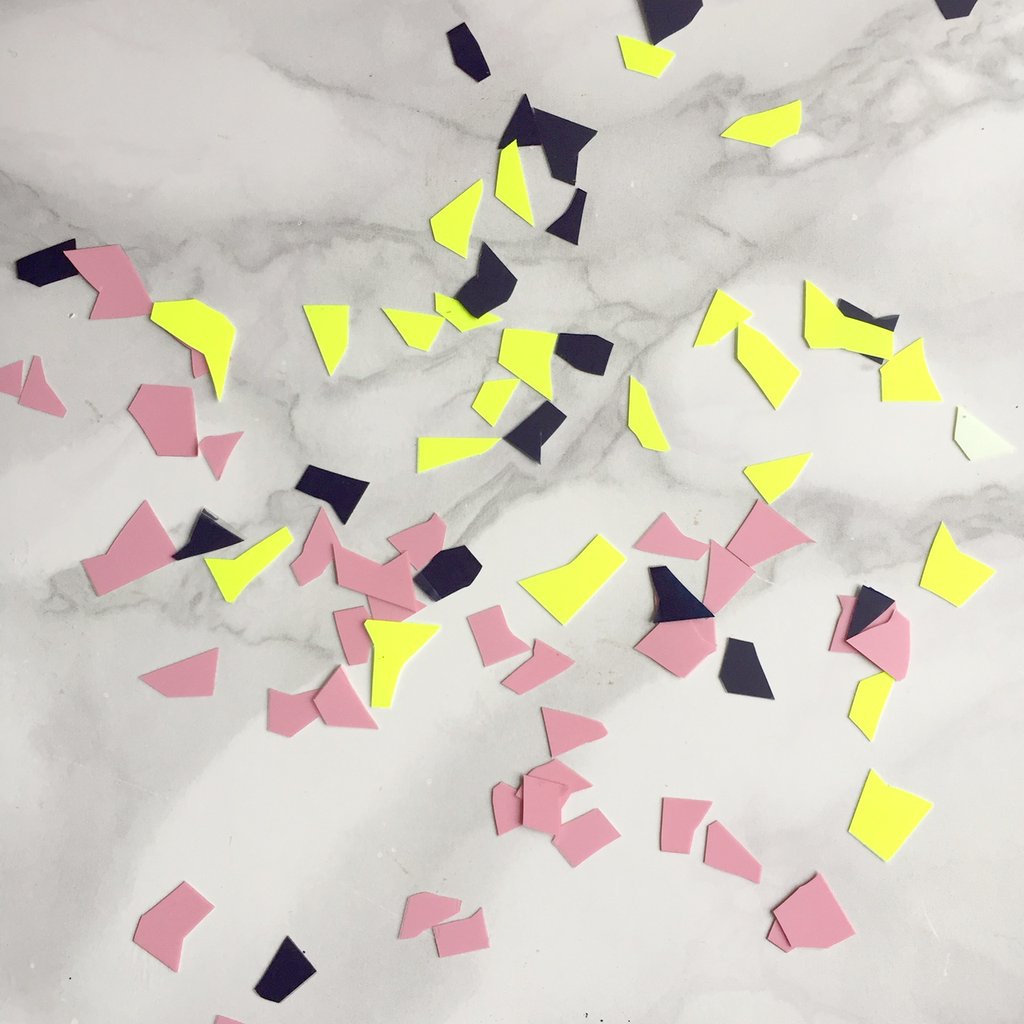
Hack Alert - add a terazzo pattern to anything fabric! October 15, 2017 10:17
 Here's a quick cheat for adding a terazzo pattern to anything fabric.
You will need
- Iron-on vinyl
- Scissors
- Iron
- Fabric item

Step One
Cut thin strips of your iron-on vinyl

Step 2
Cut little shapes from the strips. The key to the terazzo look is to change direction half way through each cut, giving jerky irregular-shaped pieces
Step Three
Put your fabric item on an ironable surface first! Then lay the little pieces in a random pattern. Be sure to have the sticky side of the vinyl down, you can usually tell from the finish which side is which. The very even side with no marks is usually the side that should be facing up.

Step Four
Iron the shapes on. Press with the iron but don't move it about. Check the instructions for how long as different brands needs different timings. But do press hard, it helps the bond to form
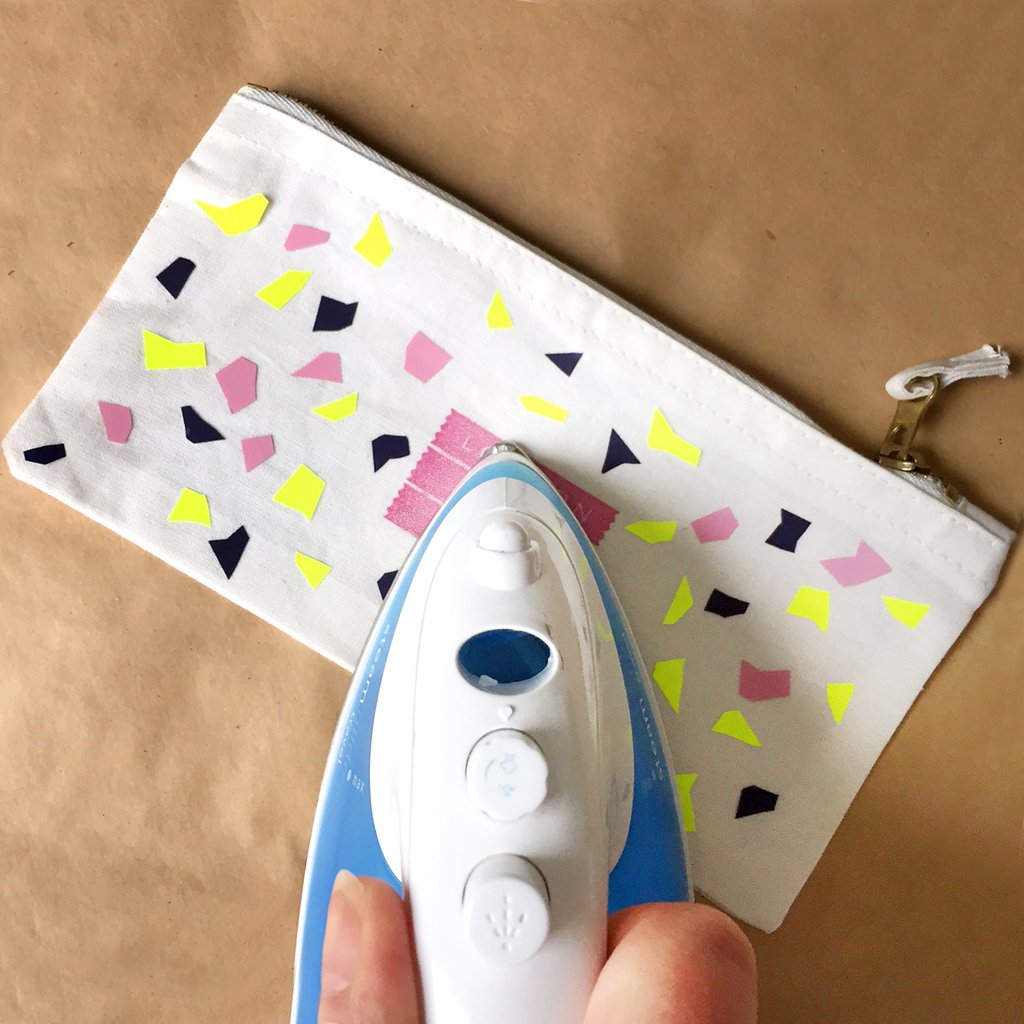
Step Five
Peel off all the protective transparent layer on top of the shapes, and you're done!

You can use this hack on any fabric at all, I'm doing t-shirts next! Here's the not very full Pinterest board

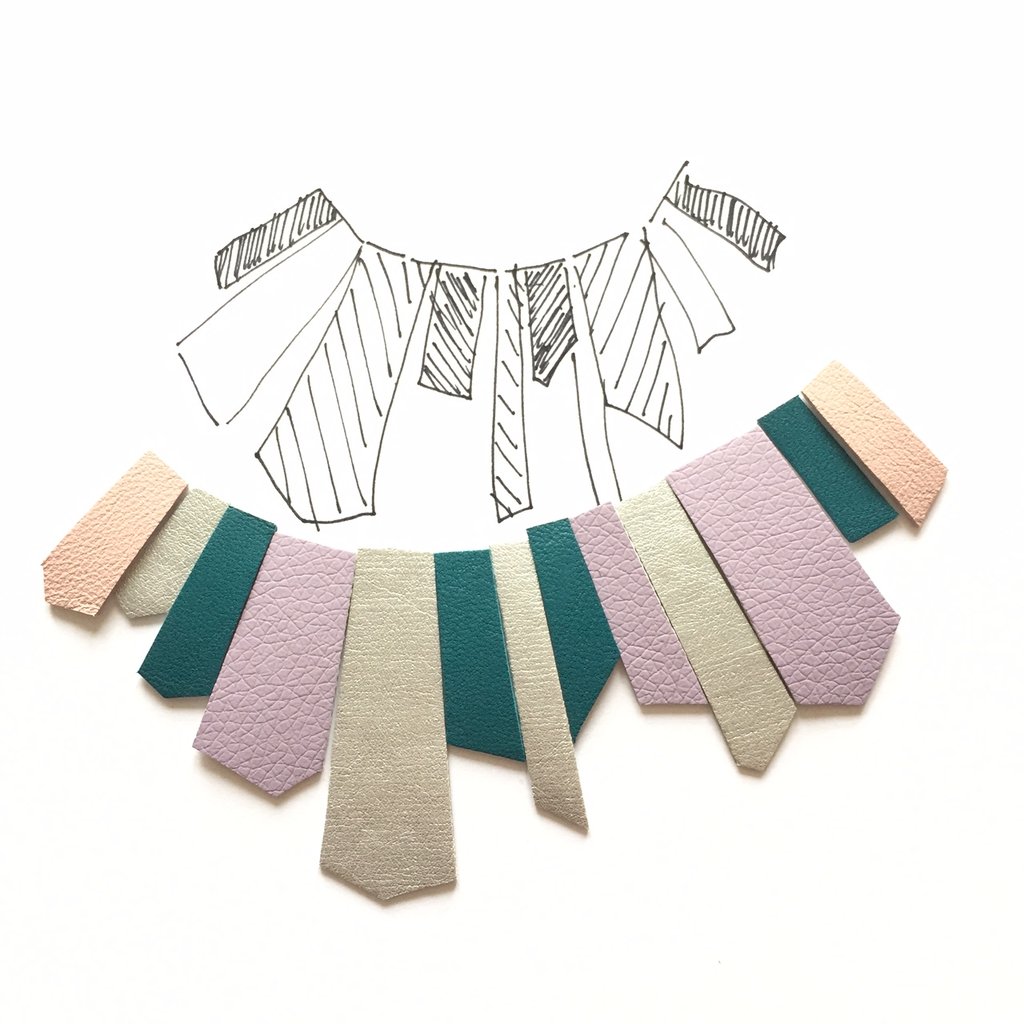
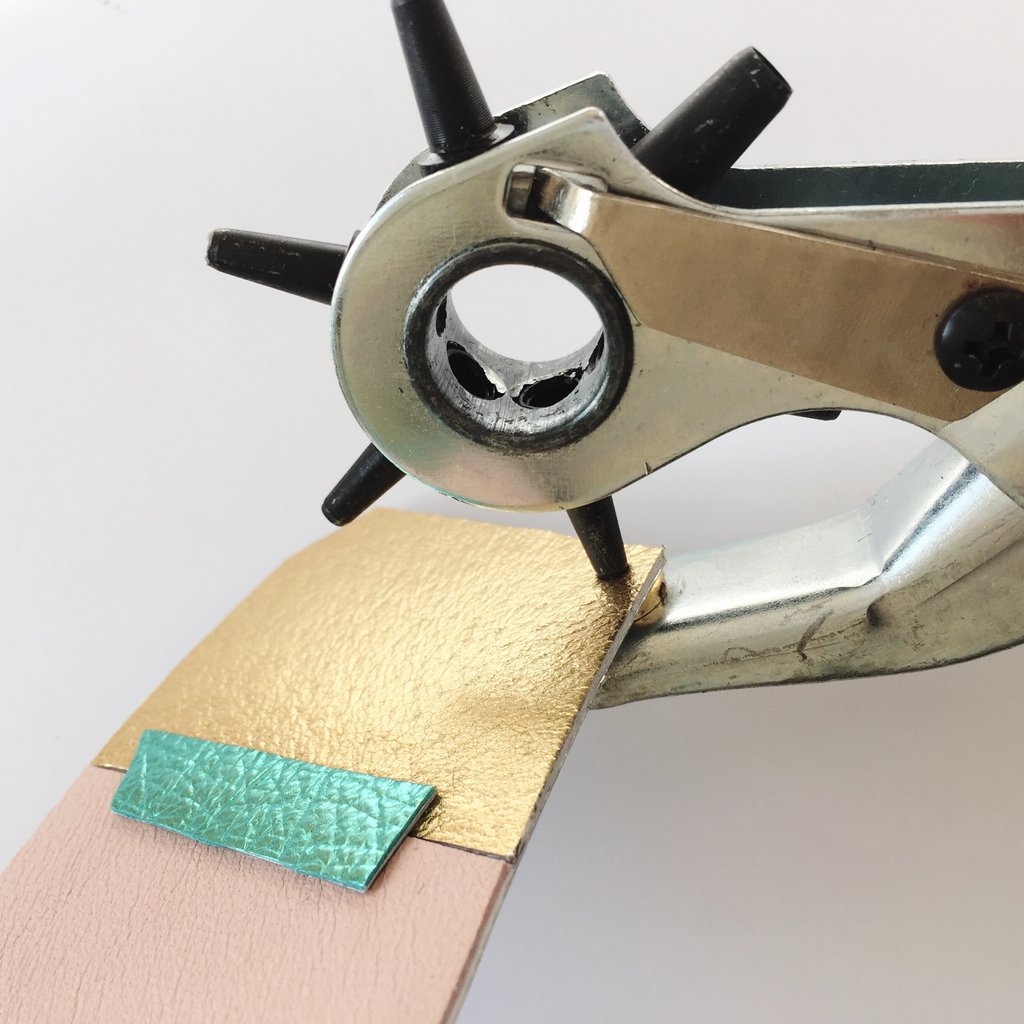
Pleather necklace DIY September 9, 2017 13:32
Recently I did an Instagram Story about a necklace I made with some leftovers I had from a workshop we'd done. It got lovely feedback I decided to make it into a proper DIY. Here's the original pic
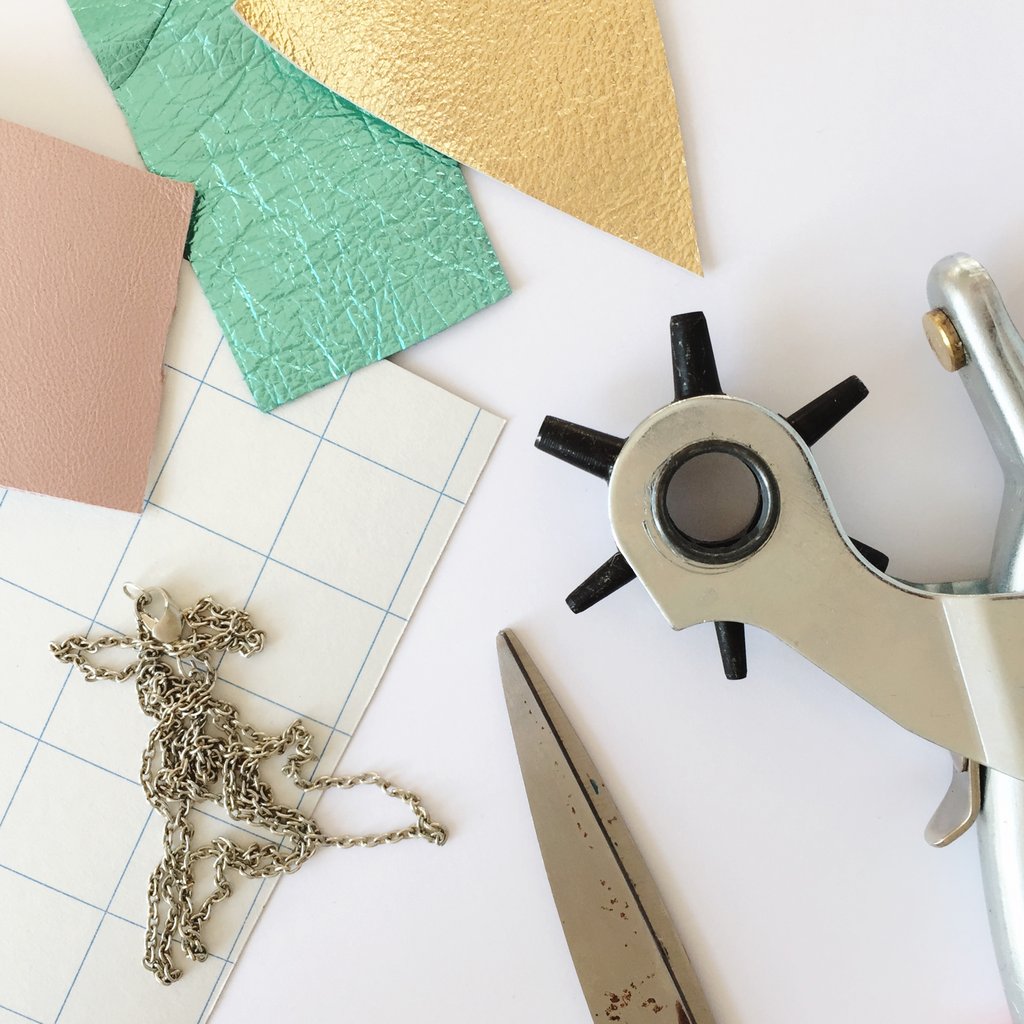
And here is the tutorial. You will need:
- Pleather or leather scraps
- Rigid sticky-back vinyl. This is the stuff we use to make lampshades, but you could exchange the vinyl for sticky back foam or felt
- Scissors or a scalpel and cutting mat
- A holepunch
- Chain and jumprings
- Doublesided tape, I like stix2anything
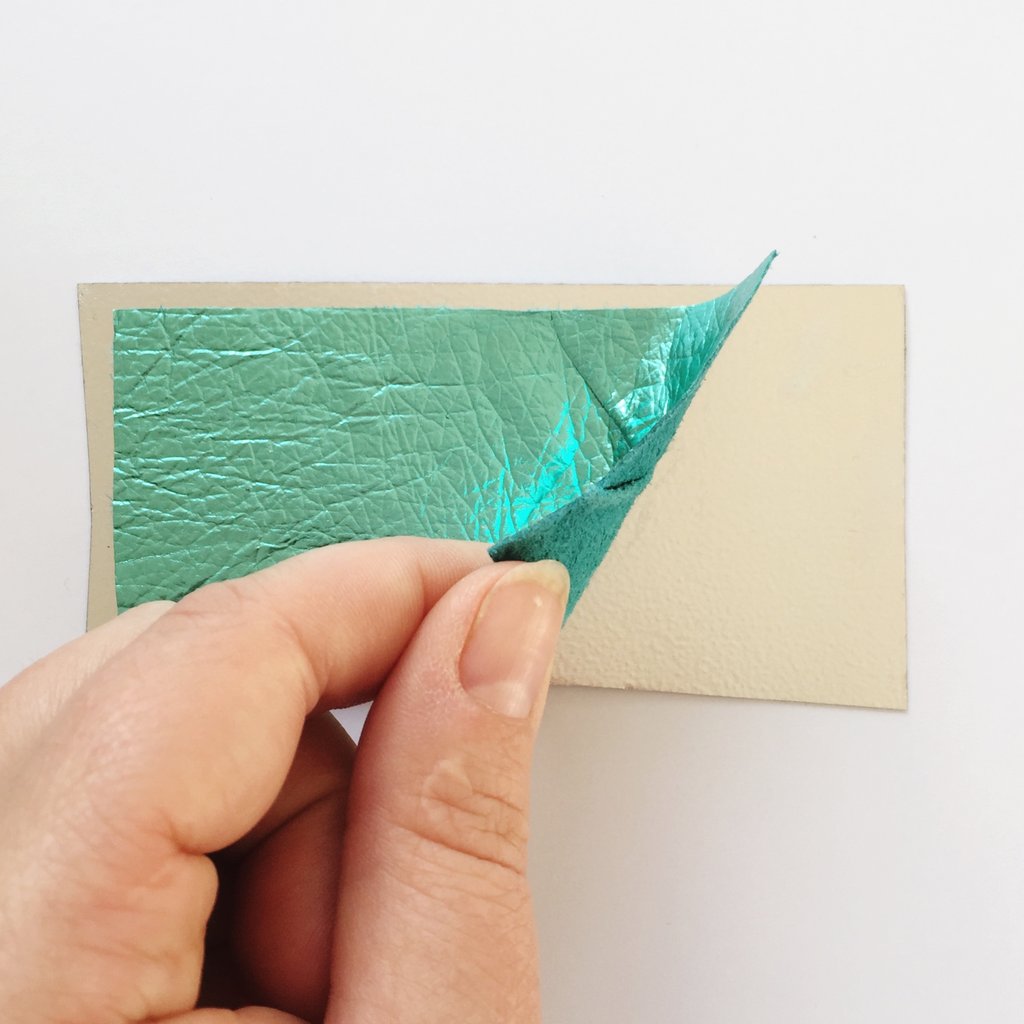
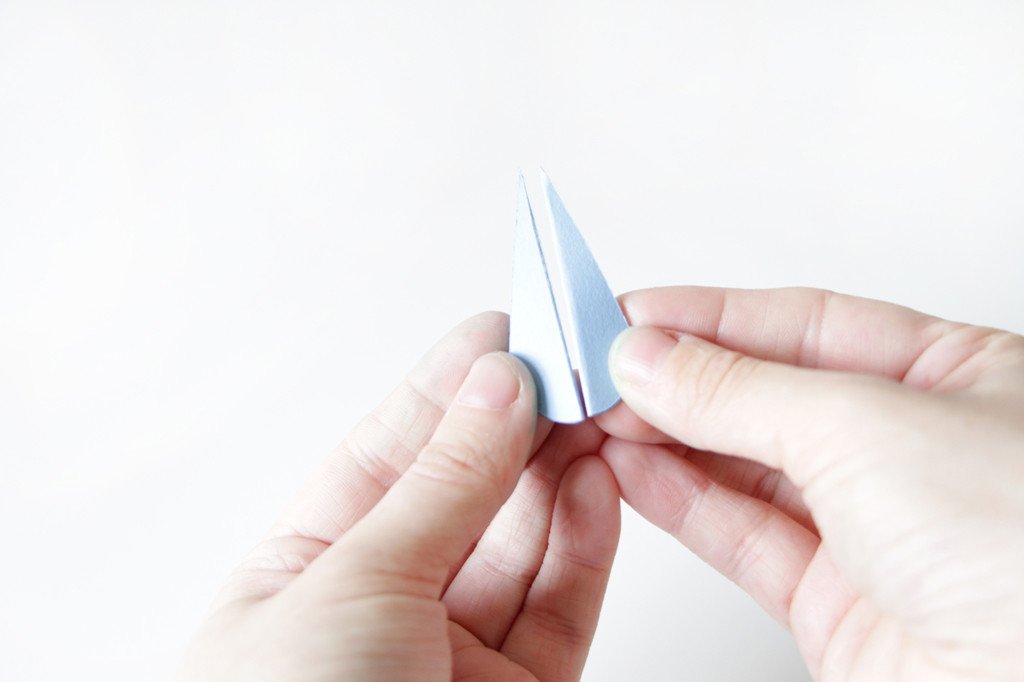
1. Stick the scraps of leather or pleather onto the sticky side of vinyl or whatever you're using, to give it a bit of rigidity and thickness
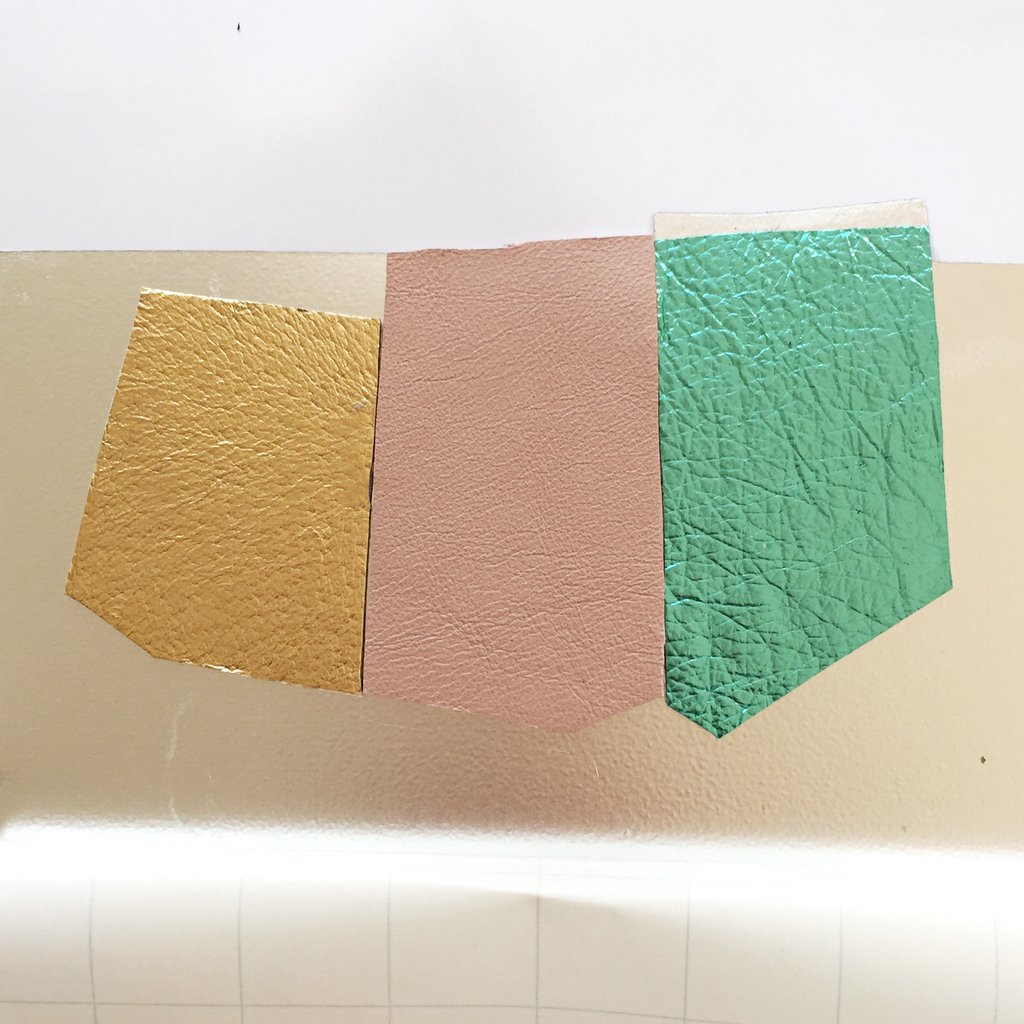
2. Plan a design based on the shape of the scraps you have

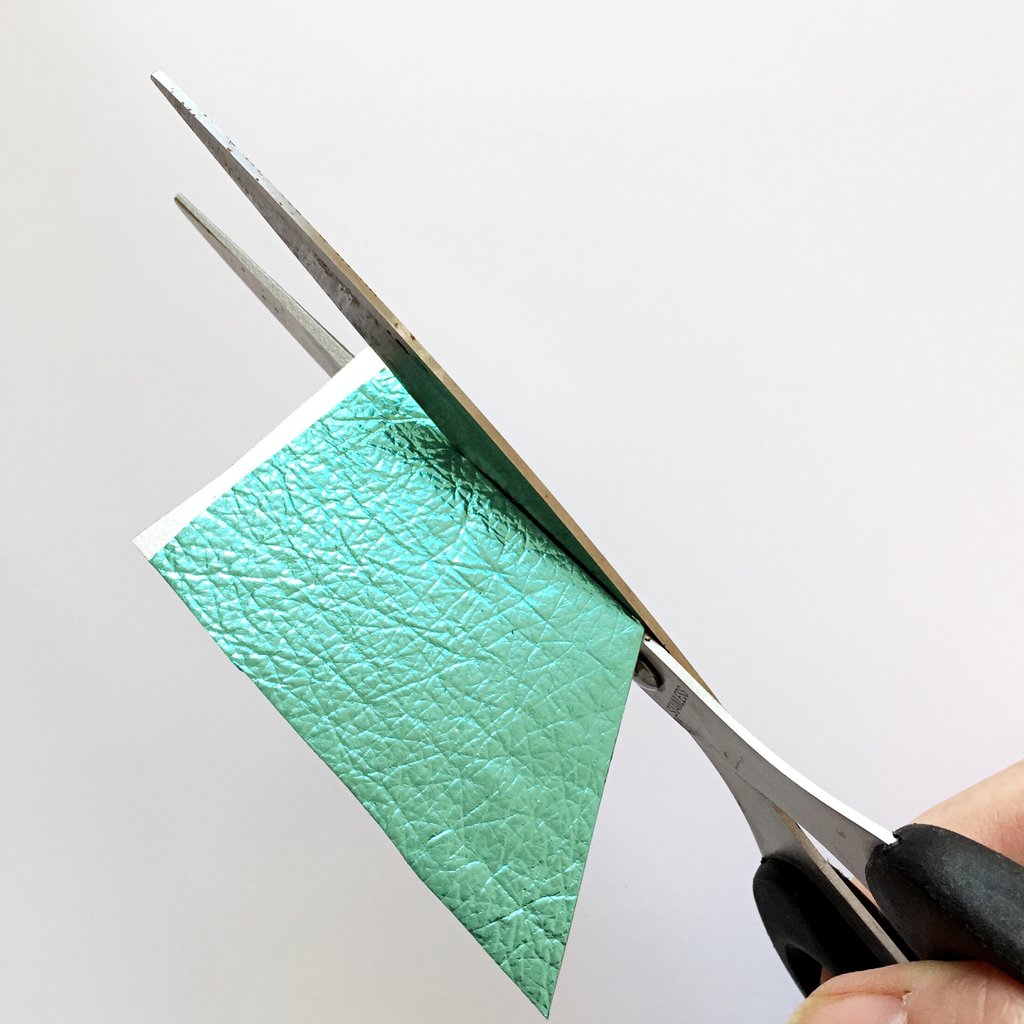
3. Trim the pieces with scissors, or for a neater effect scalpel and ruler, to match the shapes in your design
4. Peel off the the backing paper from your vinyl/felt and stick the pieces, face up, on the sticky side. Make sure they butt up neatly against each other
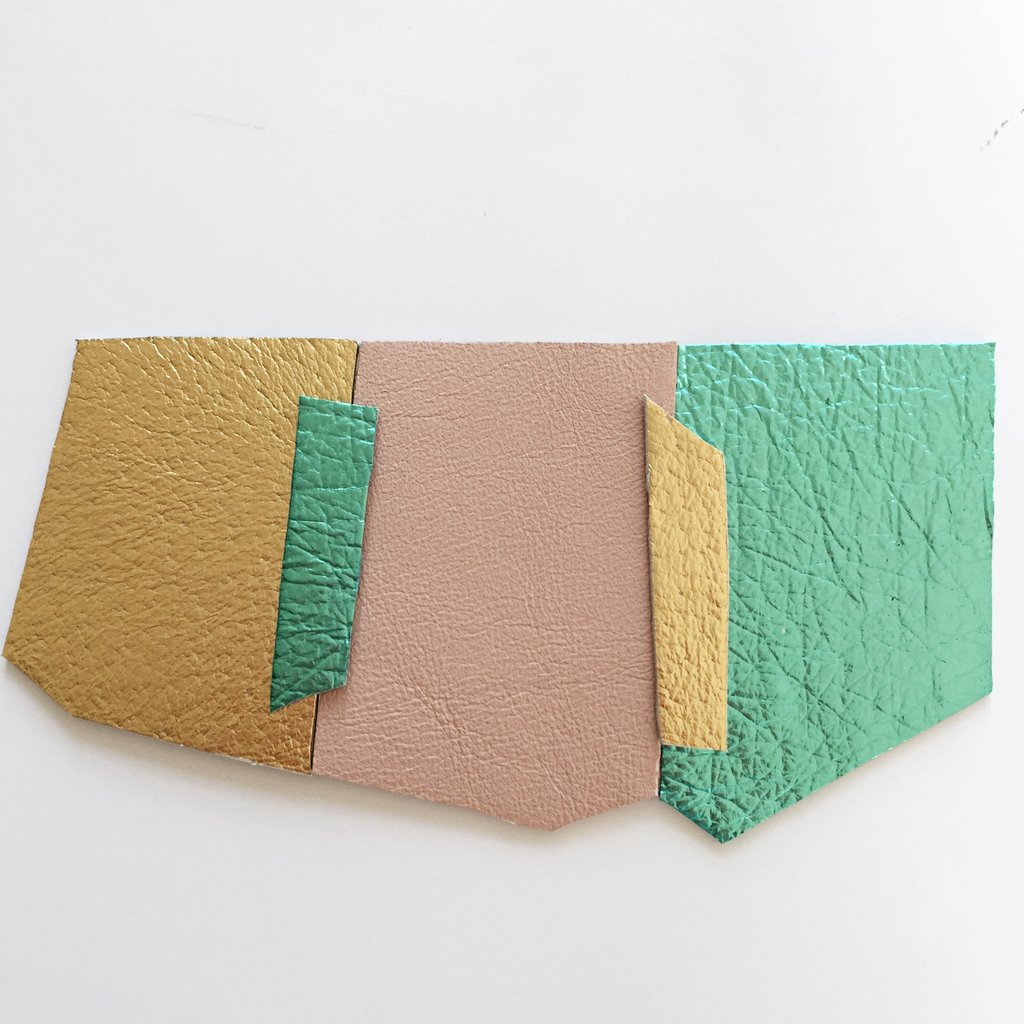
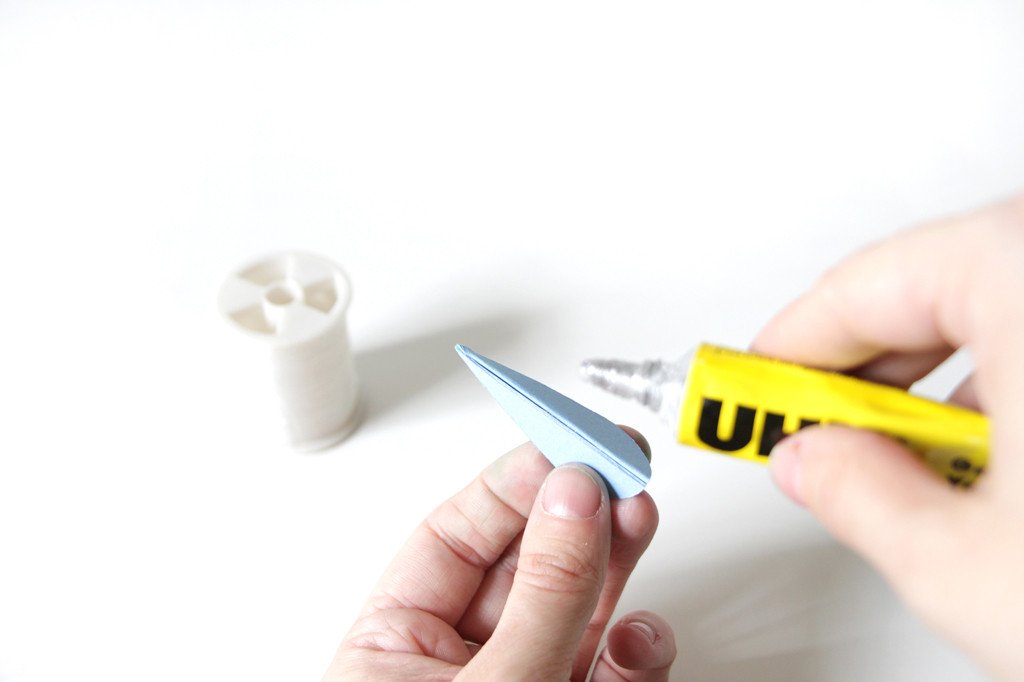
5. Trim away the excess vinyl/felt so that only your front pieces are showing.

6. I adding these extra bits made from the trimmed scraps using double-sided tape. They did the added job of hiding the not- so-perfect joins (this wont be a problem if you use a ruler and scalpel)
7. Punch a hole in the top two corners. You can pierce a hole with a spike but the holepunch gives such a satisfyingly clean and neat hole
8. Add a chain


April Showers printable April 9, 2017 08:16
 You will need:
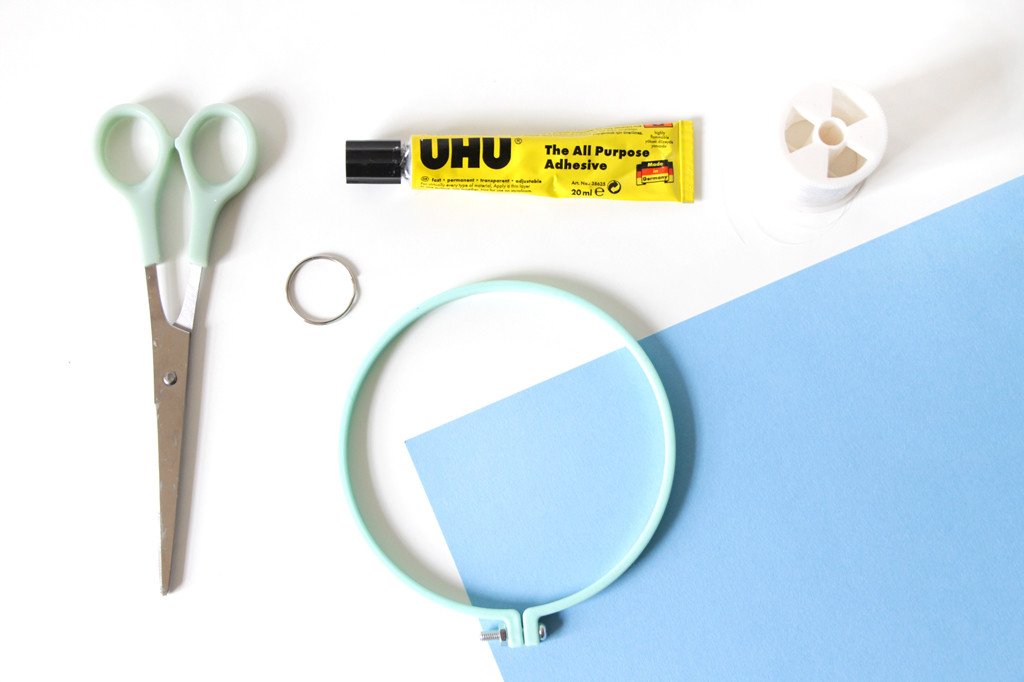


OOOh, a free printable Mother's Day card by Hannah from Utensils0 February 25, 2017 20:05
As ever, we're on it for Mother's Day! Hannah from Utensils0 has produced this gorgeous free downloadable card for you to print, cut and construct at home. What better card for your awesome Mum than this Beyonce inspired design!
You will need to download this pdf
 Print the PDF onto light A4 card. If you don't have a blank card you can use the blank half as the card folded in half.


Download this free printable feather headpiece from Utensils0 January 29, 2017 10:24 202 Comments
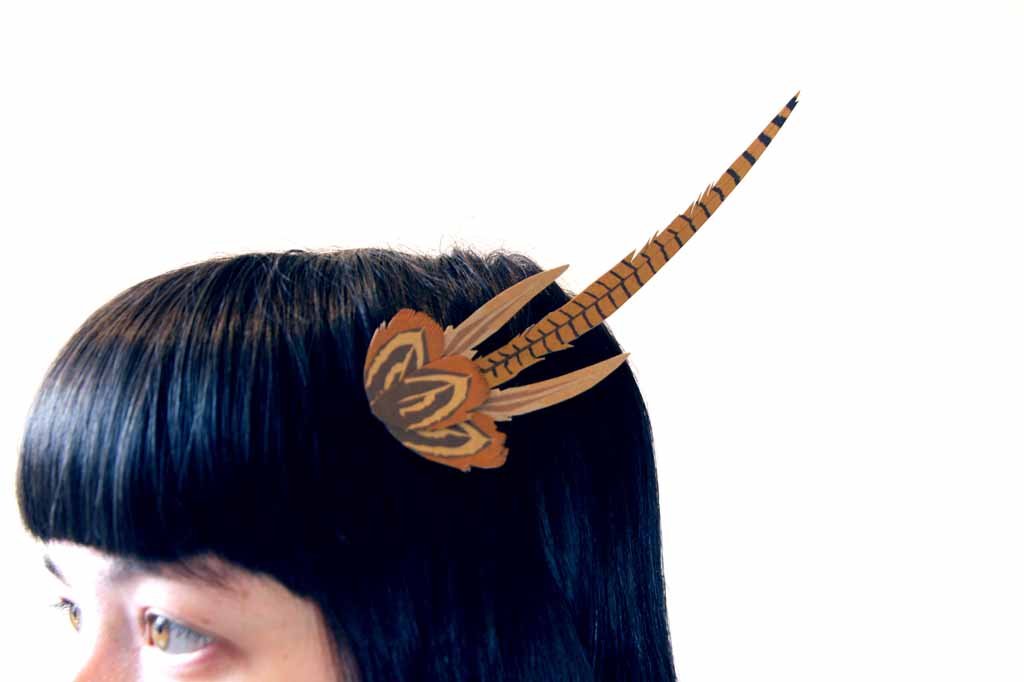
This February we're thinking about all the hen parties and wedding coming up, so Hannah made this gorgeous paper printable headpiece. Just remember this page when you suddenly realise you're supposed to have a hat...
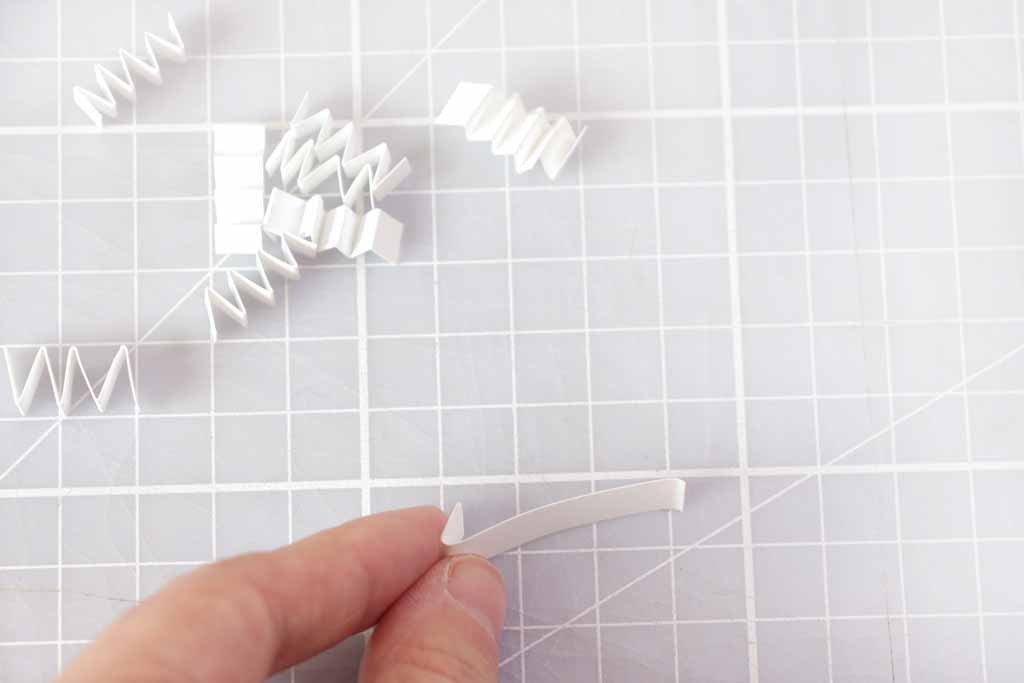
Download the pdf here and print it out, then cut out the feathers
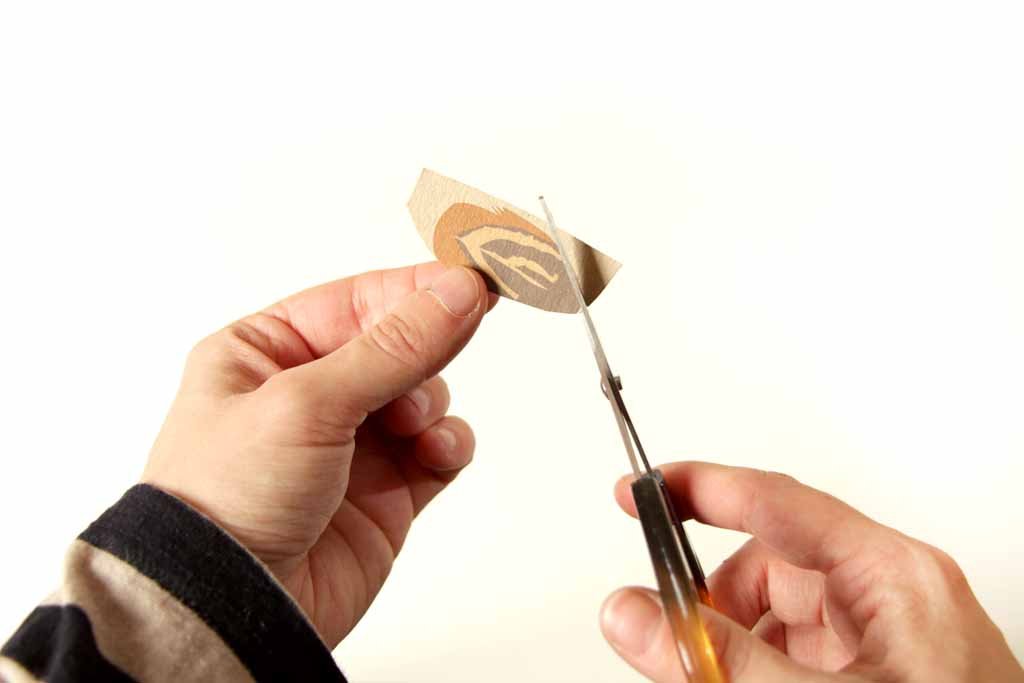
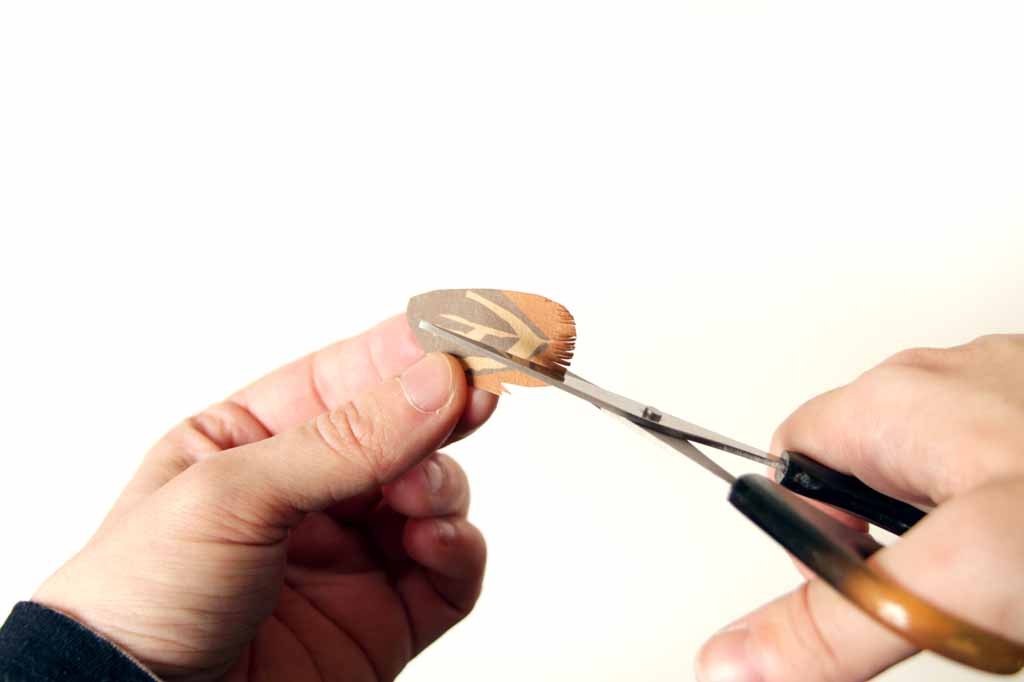
Snip into the tops and some of the sides of the feathers to give them texture
Once you’ve decided on your layout glue the feathers on top of each other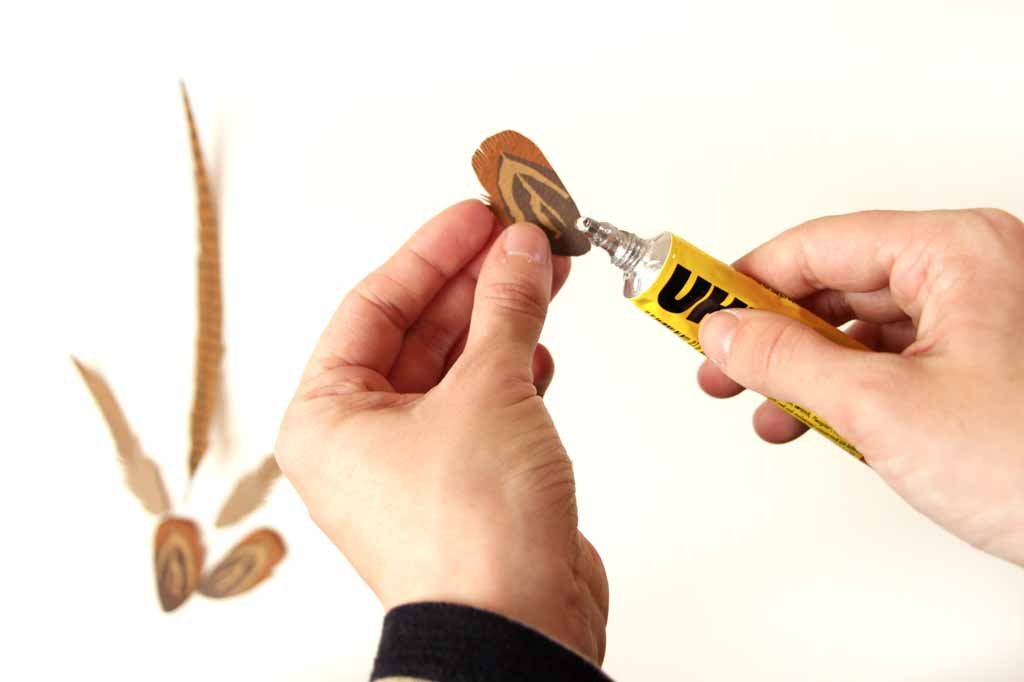
Check the angle you want the slide to sit on your feathers to make it lie the way you want it to - Glue the flat side of the hair slide and stick it to the back
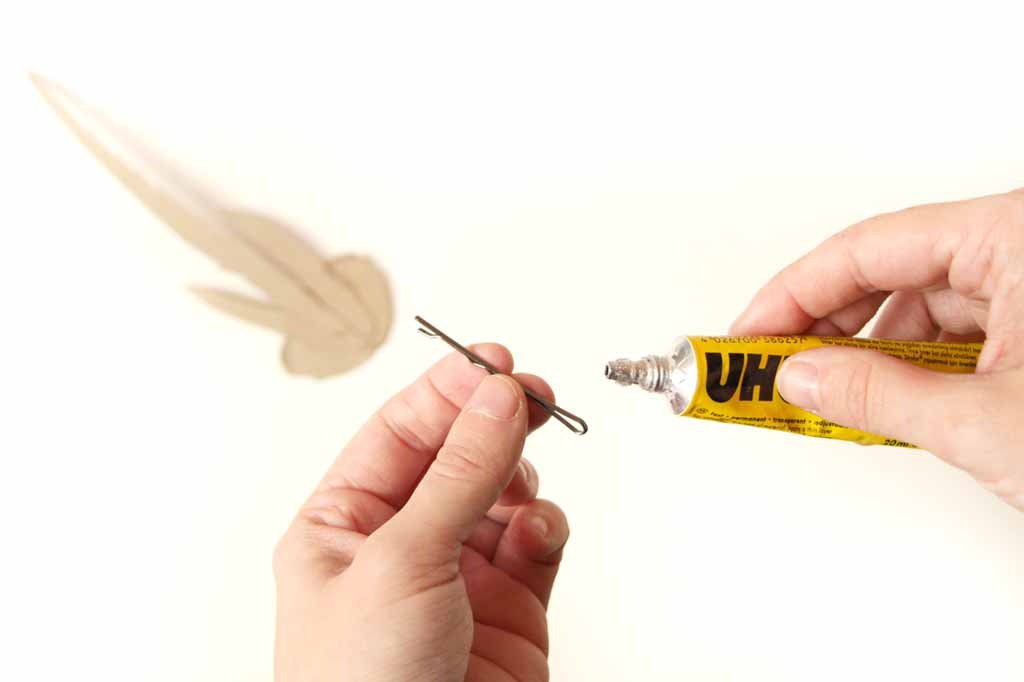
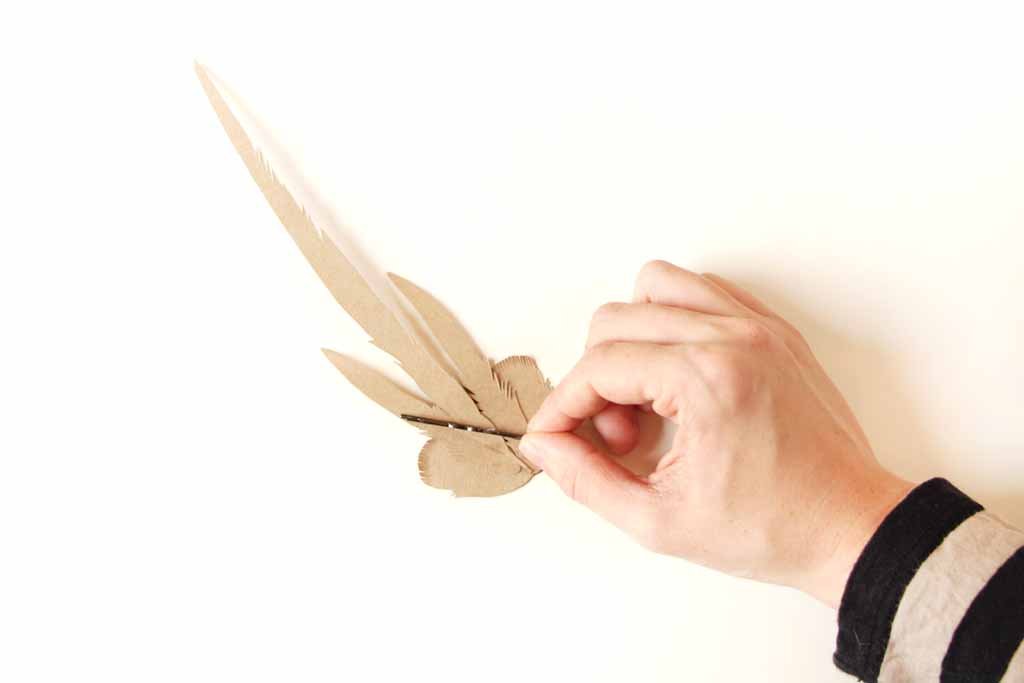
Wait for the glue to dry and wear it out with pride
Autumn Leaves Printable Garland November 20, 2016 06:44
A lovely free downloadable printable for you by Hannah of Utensils0.
 You will need:
This PDF printed onto coloured paper
Scissors
Tape
Scissors
Print out the leaves template on coloured paper. Cut out the shapes 

Free Autumn leaves lantern printable from Utensils0! September 25, 2016 00:29
 To make this gorgeous Autumn lantern by Utensils0 you will need:
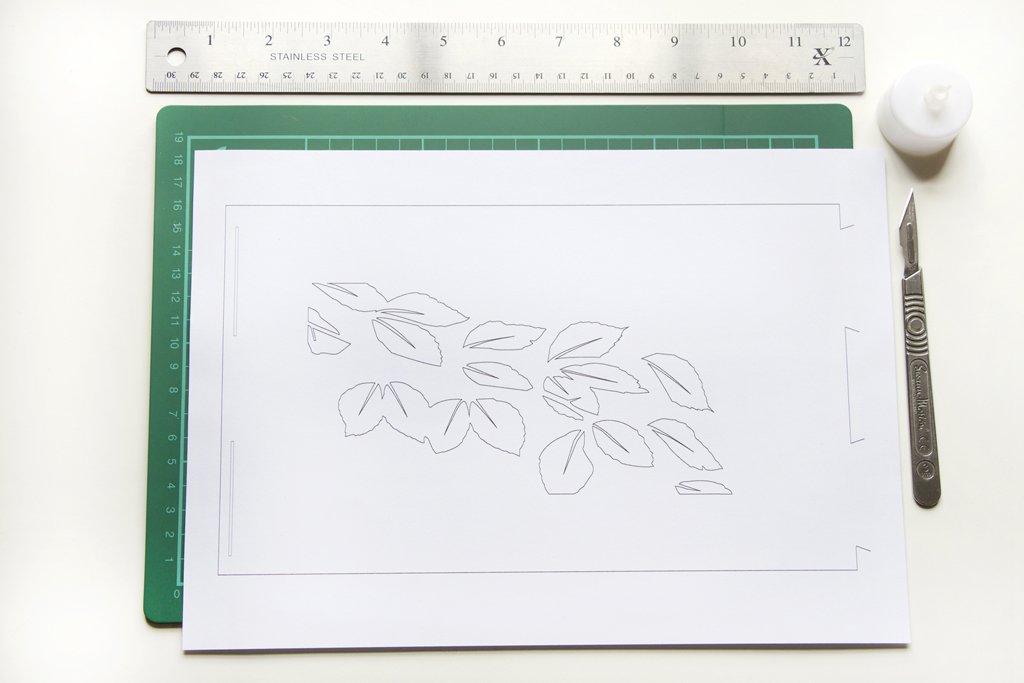


August's High Summer Printable August 26, 2016 01:16
Here's our latest printable from Utensils0! We thought we'd leave it up to you what you wanted to do with our selection of watercolour goodies but here's what we did...
.... click to download for free...

Download our gorgeous baby shower invite by Utensils0 July 9, 2016 13:08


 Glue the back of one side, and stick it down on the inside of the front half of the card (make sure you have the colourful lines and the Baby blocks on the same sides, so it reads right when you open it)
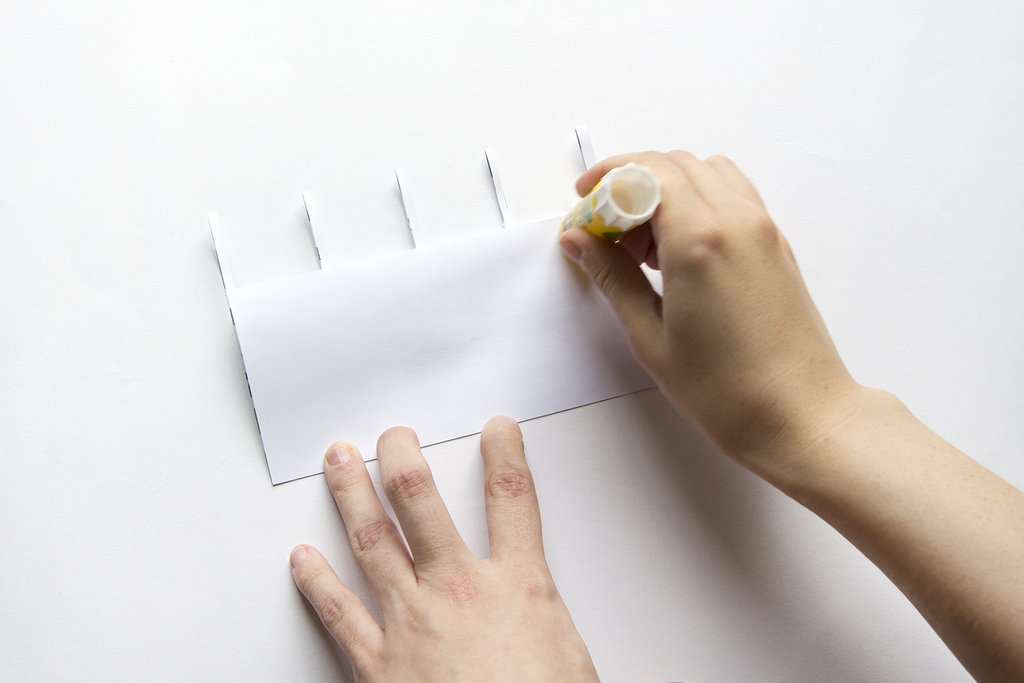


If you need to say thank you, you need this! May 13, 2016 15:28 1 Comment
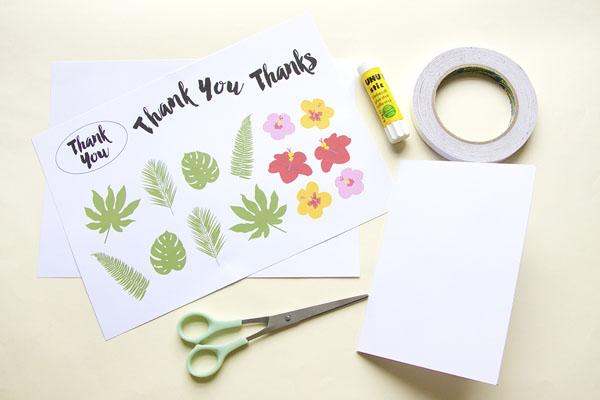
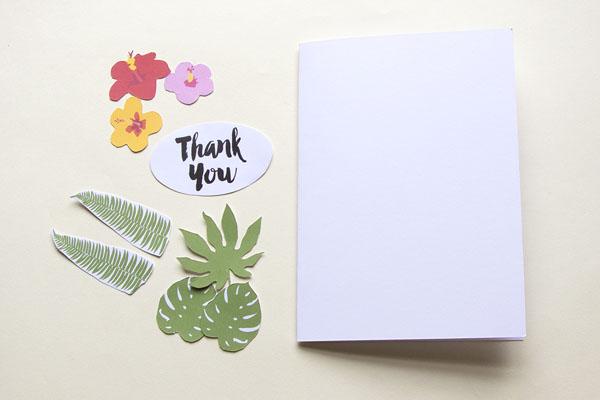
May's printable from Utensils0 is a gorgeous tropical thank you card - keep it handy on your desktop ready to print out when you need it, or make up a few to keep in a drawer.

You will need:
This PDF
White or pale coloured card folded in half or a prefolded blank card
Scissors or a scalpel
Glue or double-sided tape
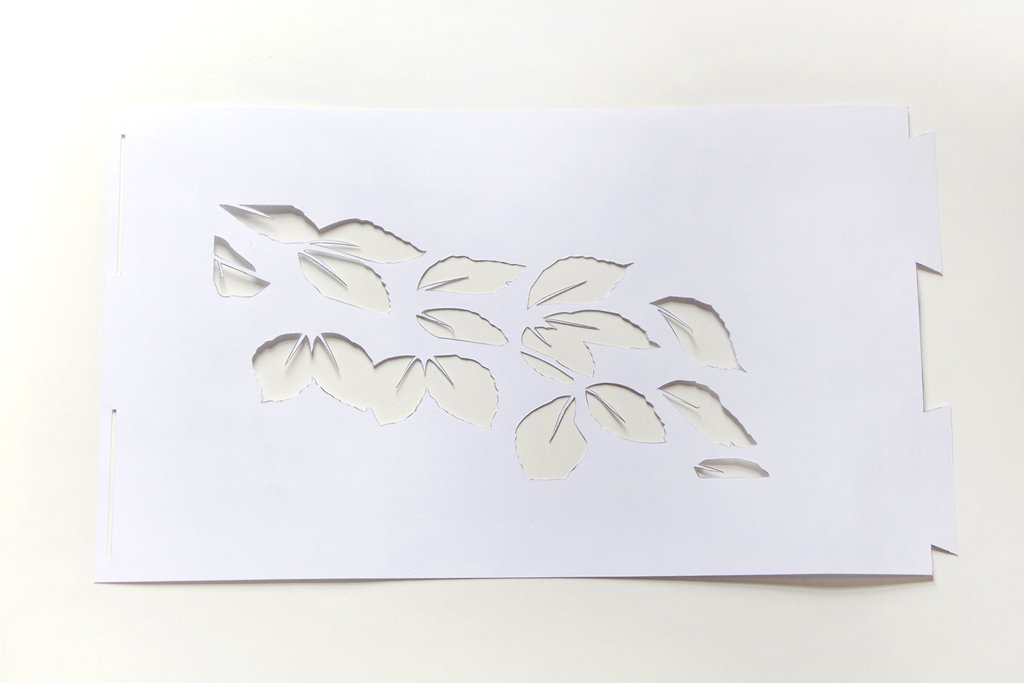
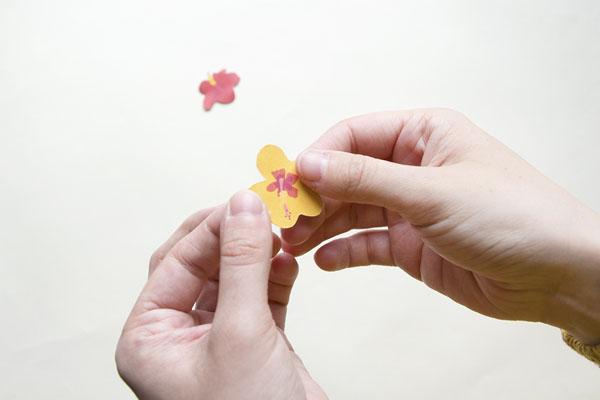
Pick which type, flowers and leaves you'd like to use and cut them out with scissors, or use a scalpel to cut out more detail
To give them a 3D effect, bend and curl the petals and leaves between your fingers
Cut 1cm strips out of card and fold them into a concertina like this
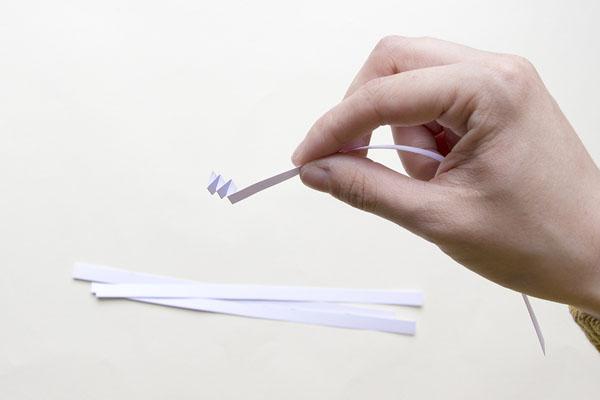
Glue or double sided tape the concertinas to the flowers and leaves and text you've picked. The bigger the concertina the more your items will pop out from the card.
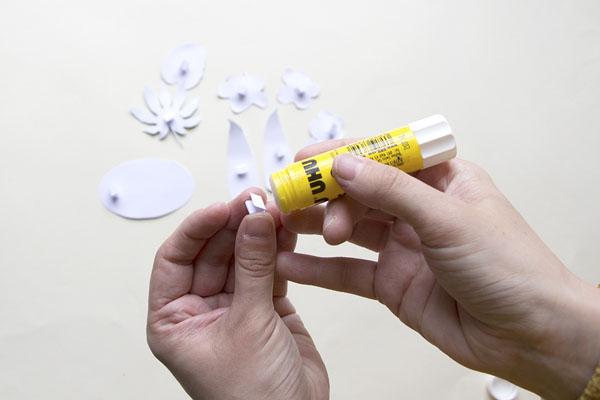
Arrange them onto your blank card and glue or double sided tape them into place.

Now you're ready to say thank you for your wedding or birthday gifts or just send your thanks to someone special!
Our April printable is this cute cloud by Utensils0 April 6, 2016 18:57


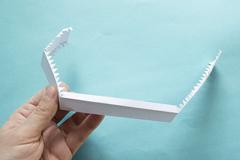


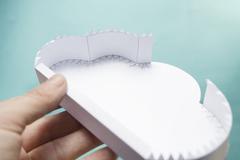


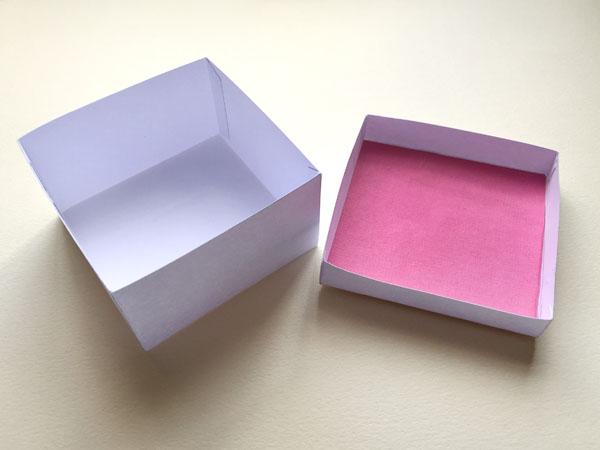
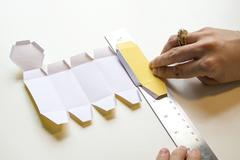
Our latest printable is this pair of papercut gift boxes February 29, 2016 23:16
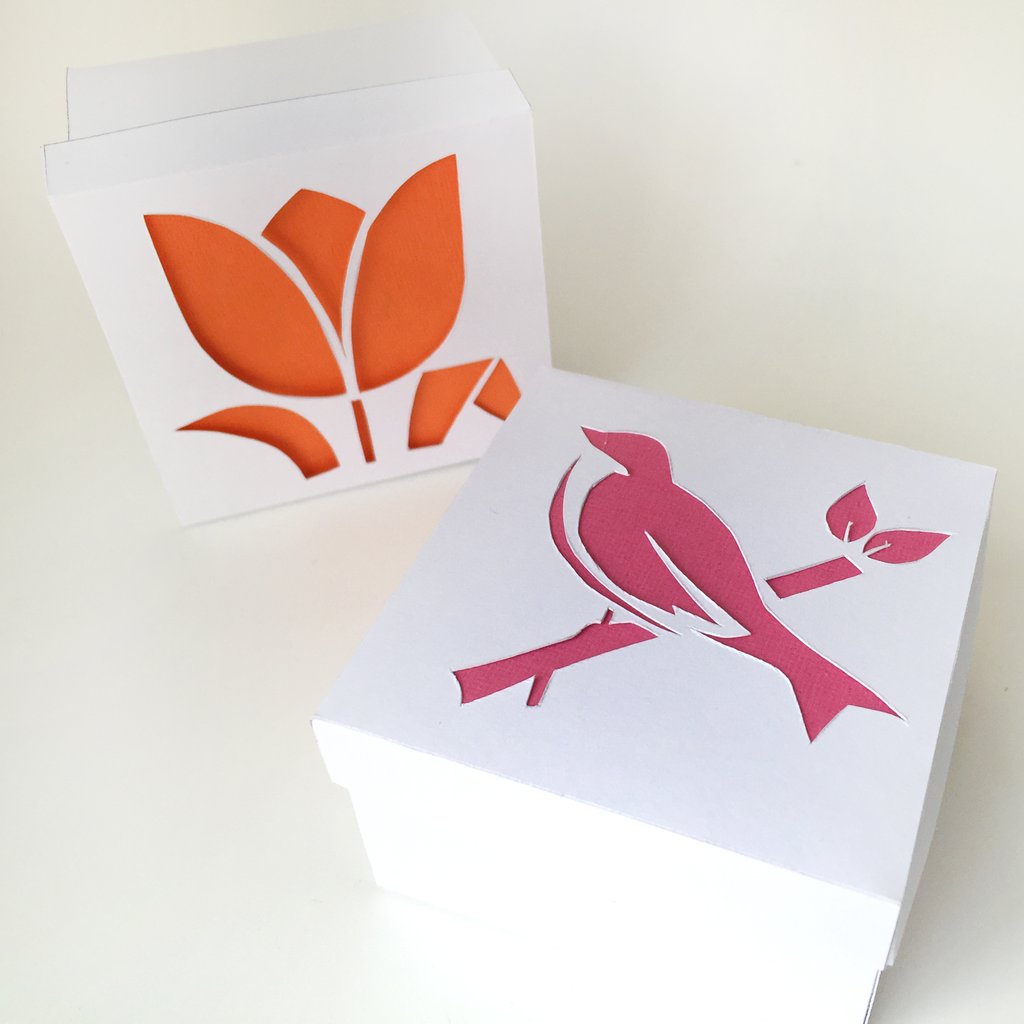 To make them you will need:
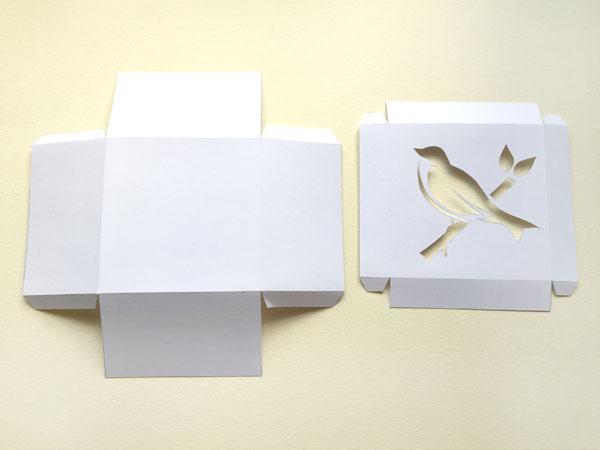

Celebrate the Pantone Colour of the Year with our free Printable mobile February 9, 2016 13:20
Pantone have for many years been at the front of colour trends and their Colour of the Year is always super influential. Last year's Marsala, a sort of reddy earthy winey brown nailed the trend for richer, colours, particularly in interiors. This year they've embraced the pastel trend that has been a firm crafty favourite from some time ... in fact they liked it so much they couldn't pick just one colour. For the first time ever they've gone for two colours - Serenity and Rose Quartz

We rather love this combination so we've made you a downloadable diamond mobile to celebrate. Get the printable here.... sadly we can't guarantee your printer will get the colour just right, so if you want to splash out a bit use a Matt Photo Paper for the best effect. Here's a tutorial on how to assemble it

Thanks to Hannah Miles from Utensils0 for putting the mobile together for us!
Top picks and tips for printable Christmas gift tags December 22, 2015 18:19
Yes we do love a printable! Having whiled away a good few hours looking through the Christmas gift tags on offer, we've put together a Pinterest board of our favourite free printables. And scroll down for a few tips on making best use of them.

1 - use card rather than paper if you can, it doesn't curl with the ink moisture and obvs is less likely to tear off. If you need to use paper, chose a mostly white design and you wont get so much curl.
2 - you can print onto brown paper for a nice effect, just cut it into A4 sheets
3 - also choose mostly white desings if you don't want to muller your ink cartridges!
4 - some of the designs have heavy outlines - try to cut inside the lines so avoid a tatty uneven line showing around the edge
5 - if they aren't in an easy-to-print .pfd file format, right click and save the image direct from the webpage, then insert it into a Word doc so you can choose how big it will print out.
6 - check for alternative colourways, often there are a few on offer if you dig about.
7 - using a scapel and metal ruler is best for neatness
8 - practise with the hole punch or you could ruin your lovely printable with a wonky placed hole!
9 - if you have a wobbly hand, try decorative edging scissors; they cut pretty shaped edges and you can get them cheap as chips from Hobbycraft or Amazon. They can hide a world of unevenness!
10 - now you know why you keep all those tiny bits of ribbon each year! Use them to attach the labels to the gifts. If you didn't save ribbon scraps then try jute string or kitchen string.
Check out our DIY wrapping board while you're there, we all know the wrapping is one of the best bits of a crafty Christmas! Enjoy
Quick paper decorations for Christmas December 5, 2015 10:15
Here's a quick tutorial for some super easy and simple paper decorations.
Download here....

One way to keep your resolutions front of mind! December 1, 2015 20:53

Meet Hannah from Utensils0 and make a paper pineapple August 27, 2015 16:24
We're really excited to be teaming up with Hannah Miles, the paper illustrator behind Utensils0.
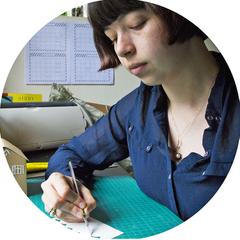
Hannah's going to be passing on some of her amazing paper skills in our Christmas card workshop in December, but to whet your appetite try out this fab paper pineapple tutorial.
 |
You will need • Scalpel or scissors • Paper (200gsm or less) printout of the pineapple template Download it here • Glue or double-sided tape • Ruler |
 |
Print out your pineapple template and cut around the shapes. Don’t cut off the white tabs, you’ll need them to assemble your pineapple. TIP: Standard printer paper will give a thinner but easier to fold pineapple. Lightweight card will give you a sturdier fruit. We recommend you use paper or card that is below 200gsm |
 |
Fold all lines on the pineapple – make sure the colour is on the outside! You can use a ruler to guide you as you fold the paper. It helps you fold straighter lines especially if you are using thicker paper |
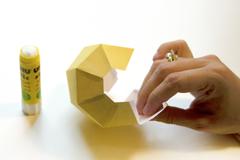 |
Glue or tape the white tabs, and stick them to the back of yellow tabs to create the curved sections at the top and bottom. Don’t tape up the long side of the pineapple yet |
 |
Carefully glue or tape the tabs on the hexagon base and stick it on – tuck the white tabs inside the body of the pineapple. |
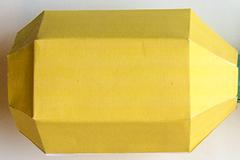 |
To close the pineapple body glue or tape last tabs. Tuck them inside and stick them in position. TIP: This will be a bit fiddly, it’s best to put your hand in from the top so you can start at the bottom and work your way back up to the top |
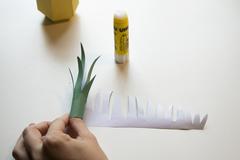 |
To make the leaves, glue along the bottom of the leaves. Then start at the largest end and roll the leaves, so that they stick as you go. TIP: Roll the leaves so that the bottom gets slighter lower with each roll, so it looks nice and like the pictures. Once the leaves are stuck you can curl each leaf between your fingers giving them a nice spiky shape. |
 |
Pop the leaves inside the hole at the top of your pineapple to complete the look! |
Free Paper Flower Tutorial and Template June 7, 2015 22:28
Today we hosted a Making Paper Flowers workshop at the Duckpond Market. Click here to download the full tutorial and the templates you need. Enjoy!


Quick denim pouch bag tutorial March 8, 2015 00:00
|
|
This denim pouch-bag is minimal, practical and very fast to make. You need an old pair of jeans, a pair of scissors (or ideally pinking shears) a skinny belt, a rubber band, and a pair of extra large rivets. Superglue is optional. |
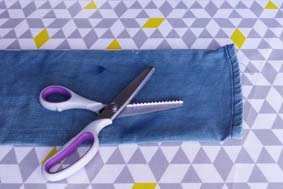 |
Pick one leg of your jeans! Pinking shears are those scissors with the zig zag blades. Cutting with them stops fraying, but if you don't have pinking shears, use normal scissors and stick your bag in the wash before you put the belt on. You'll get a shaggy soft finish on the edge. NB this only works on denim! |
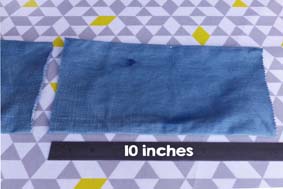 |
Chop of the hem, and then lop off a 10" (that's 25cm) section of leg, leaving you with a denim tube. |
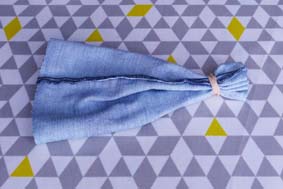 |
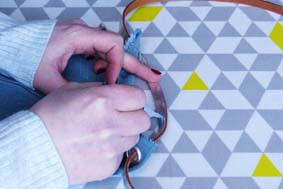
Turn your tube inside out, and wrap a hefty rubber band round one end, about 3cm from the end. |
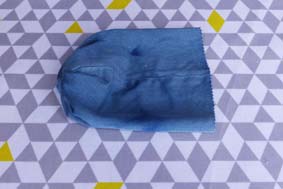 |
Turn the tube back the right way out to form a pouch, and squish it into a nice shape. Arrange the plainer of two seams up the centre of the pouch |
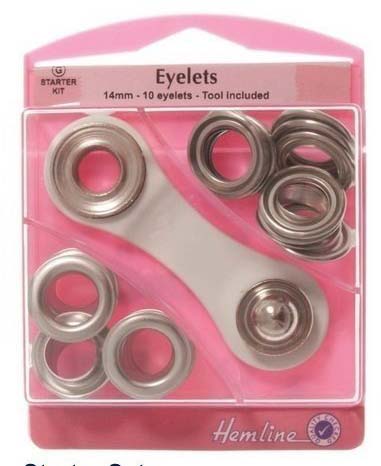 |
Set two 14mm eyelets through both layers of fabric at the open end of your tube. I wont give instructions because they come on the packet, which you buy here http://amzn.to/1x7qsGk. You want this one with the tool. . |
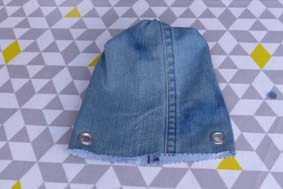 |
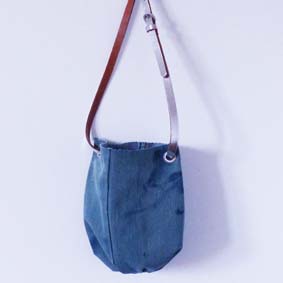
It should look like this, with the eyelets going through both layers of denim |
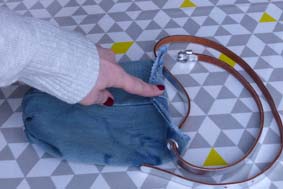 |
Thread your skinny belt through the eyelts like this, and do up the belt. |
 |
If you want your pouch to keep it's shape, use superglue to glue the belt to the back of the bag. Make sure you're happy with the position of the buckle before you glue! |
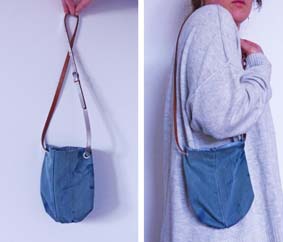 |
Ta da! This is a silver belt from COS, in case you wondered. |
| LIke it? Sign up for our newsletter and get regular tutorials, competitions, freebies and more | |